Creating a Klive Project
The IDE supports developing applications with a Klive project. With the File | Open folder command, you can open the contents of a particular folder and display it. The IDE considers folders with a well-formed klive.project file within them a Klive project.
In Klive v0.32.0, a new file, build.ksx, was introduced to allow build process customization. At the end of this article, you will find a section about updating your old Klive projects to leverage the new build system.
The New Project Dialog
With the File | New project menu command, you can create a new Klive project:
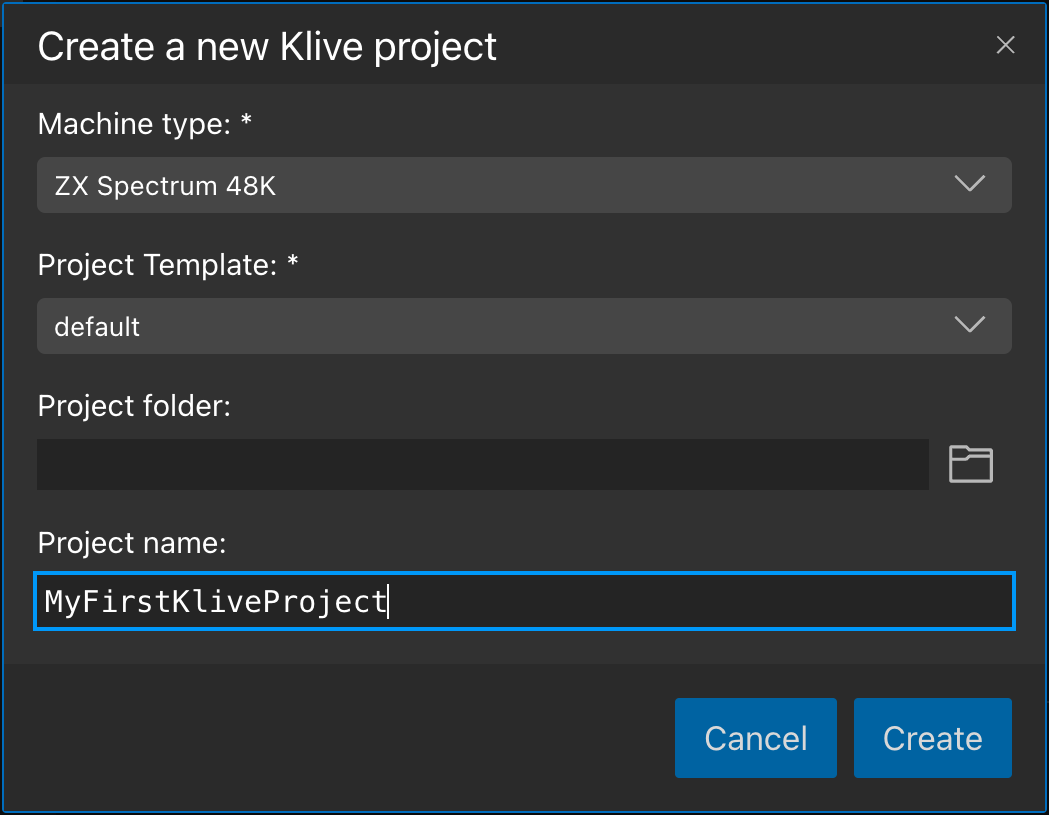
- You can select the machine type to use in the project (you can change it any time when the project is open).
- The IDE offers you a few project templates depending on the machine type.
- You can specify a root folder for your project directory. The new project will be a subfolder of the root. If you leave it empty, the new project goes into your user home’s
KliveProjectsfolder. - The project requires a name (
MyFirstKliveProjectin the figure above).
When you click Create, the IDE creates the new project folder and opens it.
The Project Structure
A Klive project is a folder with a klive.project file in it. The file is a JSON file that describes the project’s properties. The IDE creates the following structure for a new project:
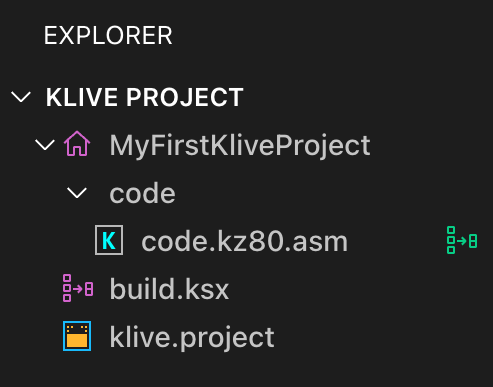
The little home icon to the left of the root folder name (MyFirstKliveProject) indicates that the open folder is a Klive project. The last two files contain essential information related to the current project.
klive.projectis the file that stores project settings, including the machine type, IDE options, breakpoints, etc. Klive IDE does not allow editing it in its code editor.build.tsxis a script file that executes within the IDE. It contains functions representing build commands.
By changing the functions’ body, you can customize the build (and create new build-related commands).
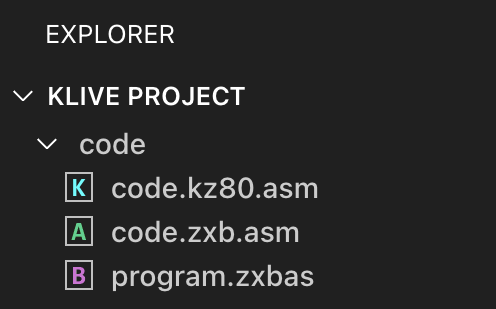
When you open a folder that is not a Klive project (does not have a valid klive.project file), you cannot see the home icon:
The Build Root
When you develop your code, you may work with multiple files — Klive needs to know the main file to compile it to machine code. The build root designates this main file. When you create a new project, Klive automatically assigns a file as the build root. In the Explorer, the “combine” icon to the right of the file name indicates this:
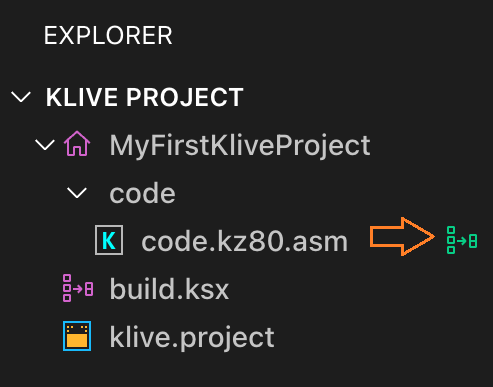
You can change the build root any time by right-clicking on a file and selecting the Promote to Build Root command.
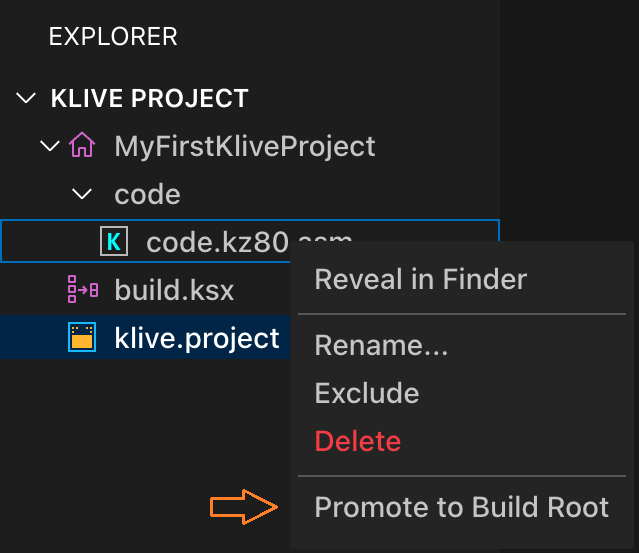
The Promote to Build Root command is available only for particular file types Klive supports.
Build Root commands
When you select the build root in the Explorer, the content of the file opens in the code editor, and it displays four icons at the right side of the document tab bar:
Each of these icons carries out a particular operation:
| Icon | Operation |
|---|---|
 | This command compiles the project using the build root file as the main file. This operation lets you check whether your code is free from compilation errors. |
 | This command compiles the project. If the compilation is successful, it immediately injects the binary code into the memory of the paused machine. After the operation, you can resume the machine and execute the code (for example, with the RANDOMIZE USR(<address>) command). |
 | With this command, you can start the compiled code. |
 | With this command, you can start the compiled code in debug mode. |
When you start the code, Klive executes several steps to ensure a one-click user experience to run or debug the code:
- The IDE compiles the code. If the compilation fails, no program is started.
- The IDE restarts the current machine on successful compilation and runs while its OS reaches the main execution cycle. At this point, the IDE may emulate keystrokes to lead the OS to a point where code execution is safe.
- Klive pauses the machine and injects the code into the memory.
- Klive sets the Program Counter (PC) register to the entry point of the injected code and resumes the machine.
- The injected code runs.
The Project File
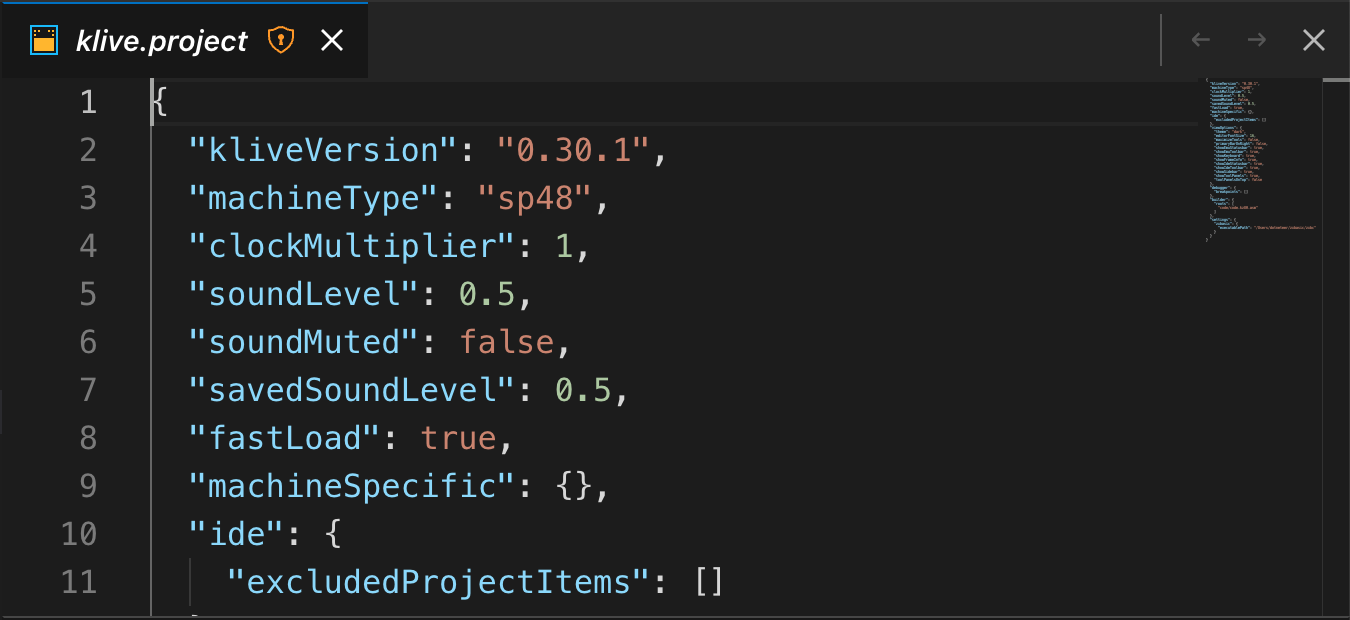
The klive.project file encapsulates information about the current project, including the machine type, UI settings, breakpoint, project state, and many others. While you work with the project, the IDE may update this file.
The project file uses JSON format. When you click it in the Explorer, you can look at its content within the code editor. However, the IDE considers this file read-only; thus, it does not allow you to edit it directly. The little shield icon to the right of the filename indicates this read-only state.
Though you cannot edit this file with the IDE, you can modify it outside. Such modifications may lead to the loss of the project file if the IDE cannot parse klive.project while opening the project folder. If you ever decide to modify klive.project manually, make sure that particular project is not open in the IDE.
Updating Old Projects
If you created your Klive project before v0.32.0, you might have a project without a build.ksx file. After v0.4.0, these projects will not compile, inject, or run your code, as it needs the build.ksx file. Follow these steps to fix the issue:
- Open your project in Klive.
- With the New file context menu, add a new file to your project root folder. (It must be the same level as the
klive.projectfile.) - Type the following code into the
build.ksxfile:
export function buildCode() {
  $command("klive.compile")
}

export function injectCode() {
  $command("klive.inject")
}

export function runCode() {
  $command("klive.run")
}

export function debugCode() {
  $command("klive.debug")
}

export function exportCode() {
  $command("display-dialog export")
}- Close the project.
- Open the project again; Klive recognizes the
build.ksxfile and prepares the build functions accordingly. - Now, you should be able to compile, inject, and run your code.