Exporting Code
When your code is ready to be tested on actual hardware or with another emulator, you can export it with the Build | Export code menu command. This command pops up a dialog:
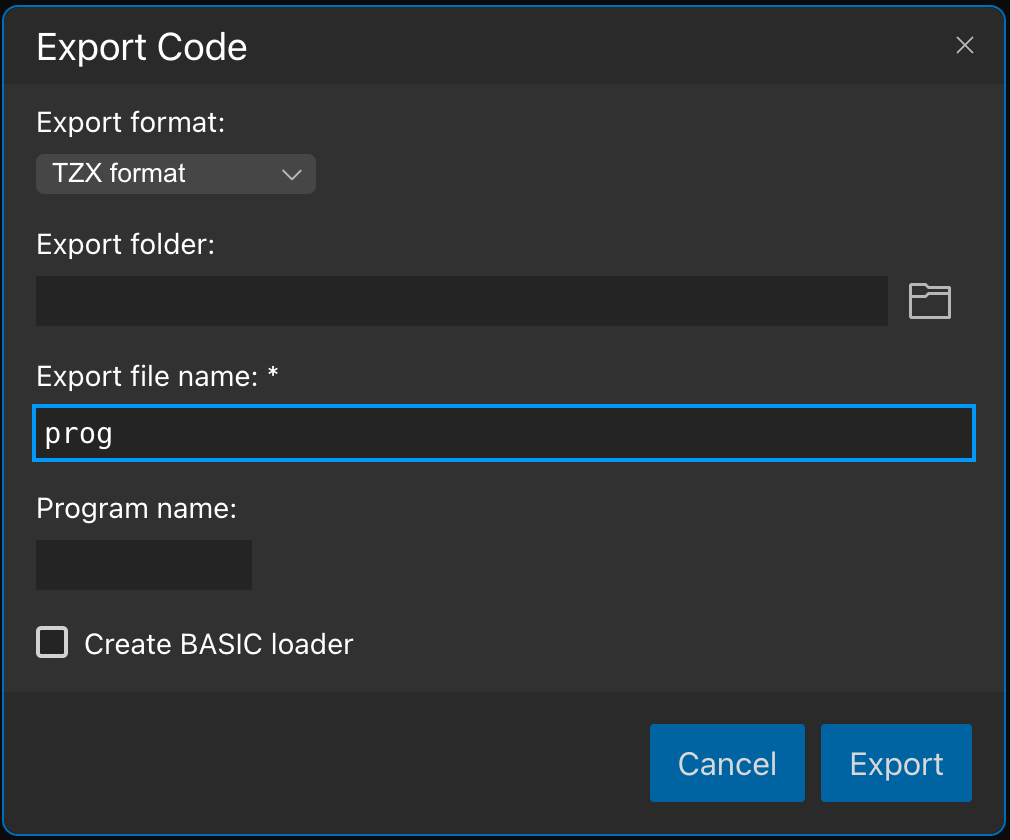
The Export Dialog
Before exporting the code, you can specify several parameters:
- Export format. You can select one of these file formats from the dropdown to export your code:
- **
TAP format: Standard.tapfile format - **
TZX format: Standard.tzxfile format - **
Intel HEX format: Standard text file format you can use with classic tools (e.g., EPROM burners).
- **
- Export folder. An optional folder to save the exported file. If you do not specify this folder, the IDE will save the exported file into the
KliveExportsfolder under your home directory. - Export file name. The filename for the export is mandatory. If you do not specify a file name extension, Klive will add it according to the selected export format.
- Program name. The name to add to the tape file header. If you leave it empty, the export infers the program name from the export file name.
- Create BASIC loader. (This option is not available with Intel HEX format.) If you check this option, the export creates a BASIC loader for your code; otherwise, it creates a simple file you can load as a port of your custom loader.
If you are about to export the code with a BASIC loader, you can set other options:
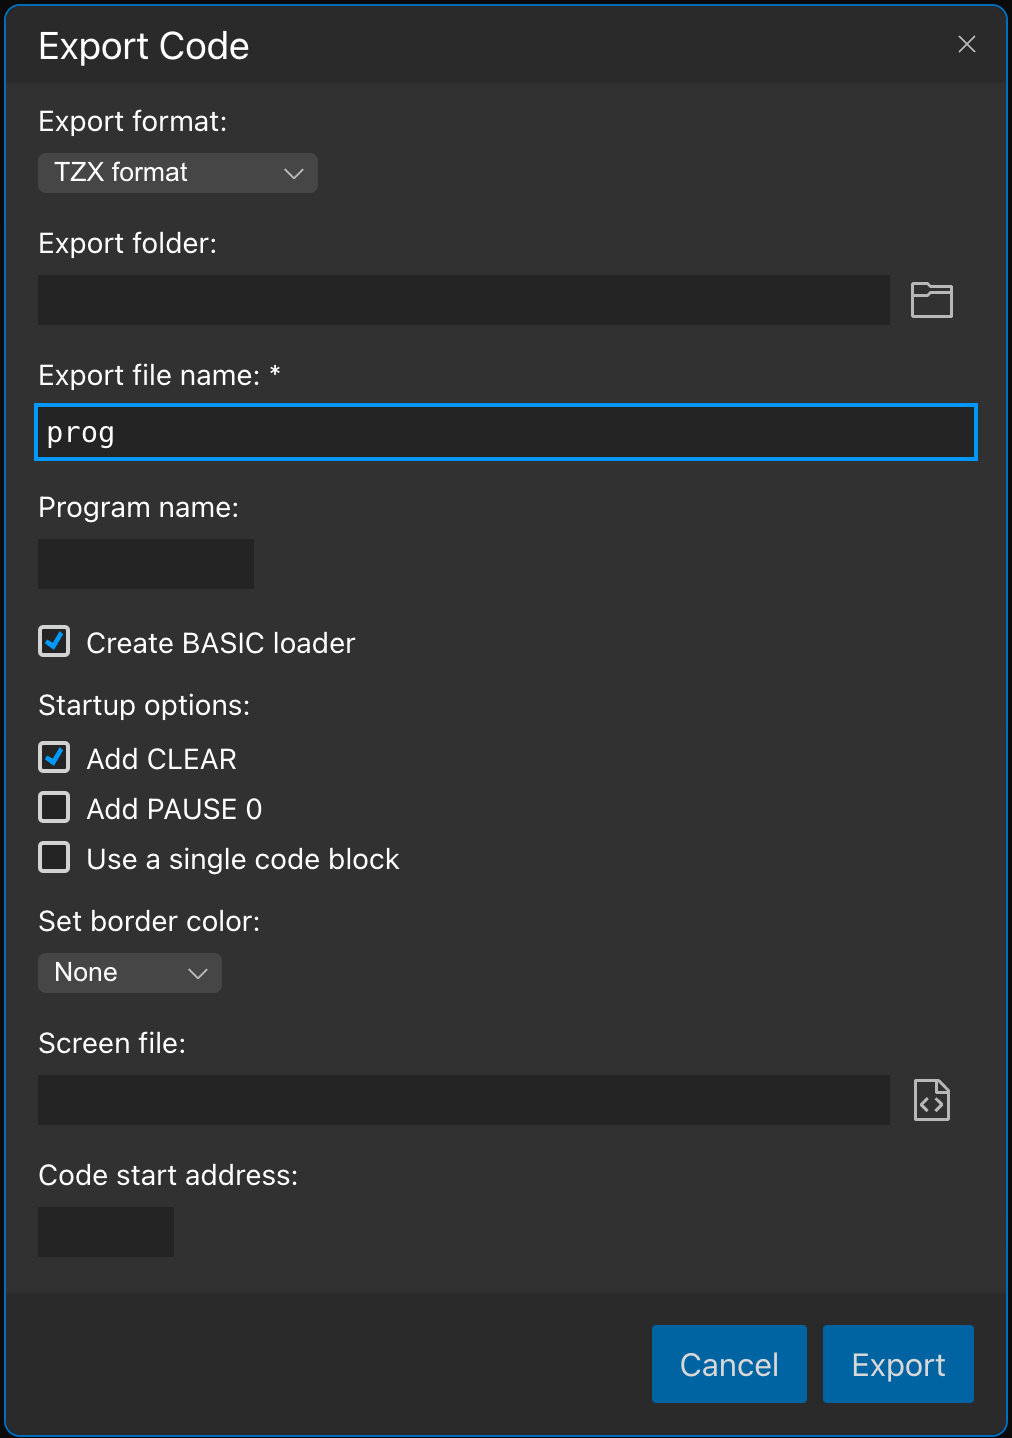
- Add CLEAR. Adds a
CLEARstatement to the loader. - Add PAUSE 0. Adds a PAUSE 0 statement to the loader. When your code has been completely loaded, it waits for a keypress before running.
- Use a single code block. If this option is checked, your separate code segments (according to their
ORGdirectives) are merged in a single block, gaps filled with zeros. Otherwise, the export creates a separate code file for each code block. - Set border color. You can specify a color for the border during the load operation (while loading the app’s code files).
- Screen file. You can optionally add a screen file for your code. The IDE accepts these formats:
- A
.tapor.tzxfile that is created when saving a screen (with theSAVE "<name>" SCREEN$command) - A standard 6912 bytes long
.scrfile with the raw screen contents. - A standard 7040 bytes long
.scrfile with 128 bytes +3DOS header and the raw screen contents. Klive does not test the +3DOS header; it just uses the raw screen bytes.
- A
- Code start address. The IDE infers the code start address from your code (according to the ORG, XORG, ENT, or XENT pragmas), so you can leave this field empty. However, you can specify another start address by typing a decimal value here. This address cannot point to the ROM; it must be between 16384 and 65535.
The BASIC Loader
According to your options, Klive generates a BASIC loader for the ZX Spectrum 48K/128K/+2/+3 models. This loader ensures that other files (screen, code) are loaded in the correct order (and the right memory location).
The ZX Spectrum 128K models and above support memory paging, and you can compile multi-bank code with the BANK pragma. When your code uses multiple banks, the loader ensures they are loaded into the appropriate bank.
With the following steps, you can examine the structure of the loader:
- Turn off the fast LOAD mode in the emulator toolbar (with the rocket icon).
- Load the exported file. When the first block is loaded, pause the machine.
- You can view the code with the IDE | Show BASIC Listing menu command.
Overriding the Current Tape File
You can set the current tape file with the Machine | Select tap file menu command. This command loads the selected file and sends it to the emulator.
When you export a file in the IDE and overwrite the currently selected tape file, the emulator will still use the contents of the previously selected tape file, as the file update does not send the new file contents to the emulator. However, the emulator picks up the updated file when you click the rewind button in the toolbar (or use the Machine | Rewind tape menu function).