There is no better way to learn about Visual Studio Packages than creating a simple one. In this post, I will guide you through the steps of establishing a simple skeleton for your custom VSPackage.
Creating a VSIX Project
To create your first package, follow these steps:
1. Start a new Visual Studio project in the traditional way with the File | New | Project command. In the templates category, select Visual C#, Windows, and then, Extensibility. Here choose the VSIX Project template. Name your project to EmptyPackage (Figure 1).
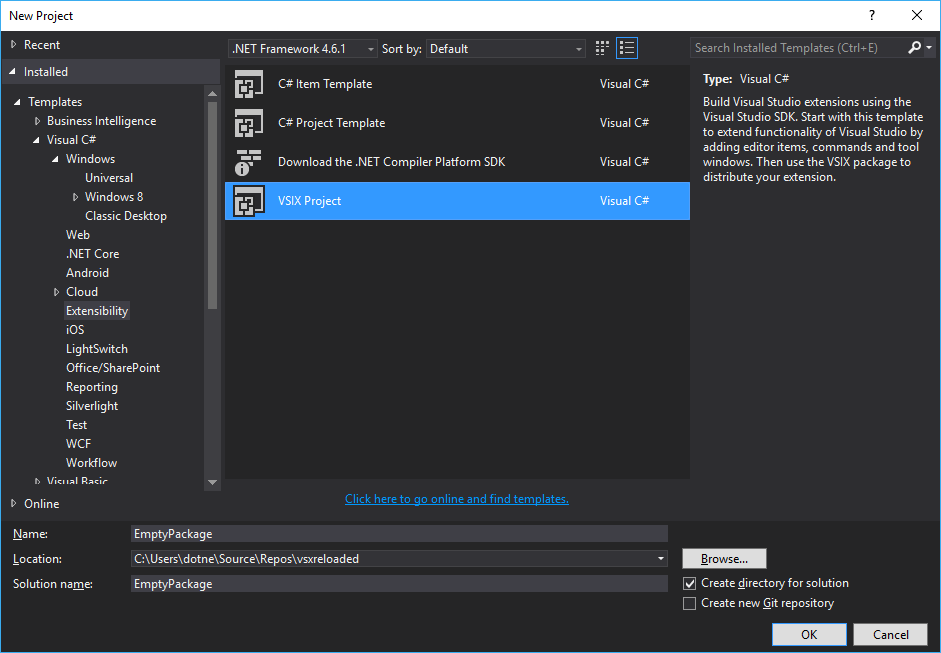
Figure 1: The New Project dialog set up to create a VSIX Project
2. When you click OK, Visual Studio creates a small project with a few files (Figure 2) and displays a Getting Started page within the IDE. Take a look at the structure of the solution. You can recognize that the index.html and stylesheet.css files belong to the Getting Started page, and the only payload is source.extensions.vsixmanifest. Observe that the list of references is empty.
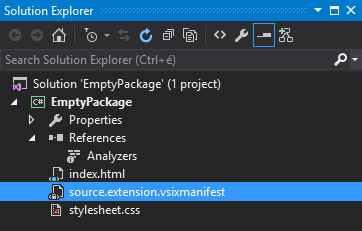
Figure 2: The structure of the initial VSIX project
3. The .vsixmanifest file—as its name suggests—describes the content of the VSIX installation file, which is the output of the built project. The manifest contains all the information that Visual Studio utilizes to understand the structure of the extension and copy its contents to the right location. In Solution Explorer, double-click the manifest file to open it in the designer (Figure 3).
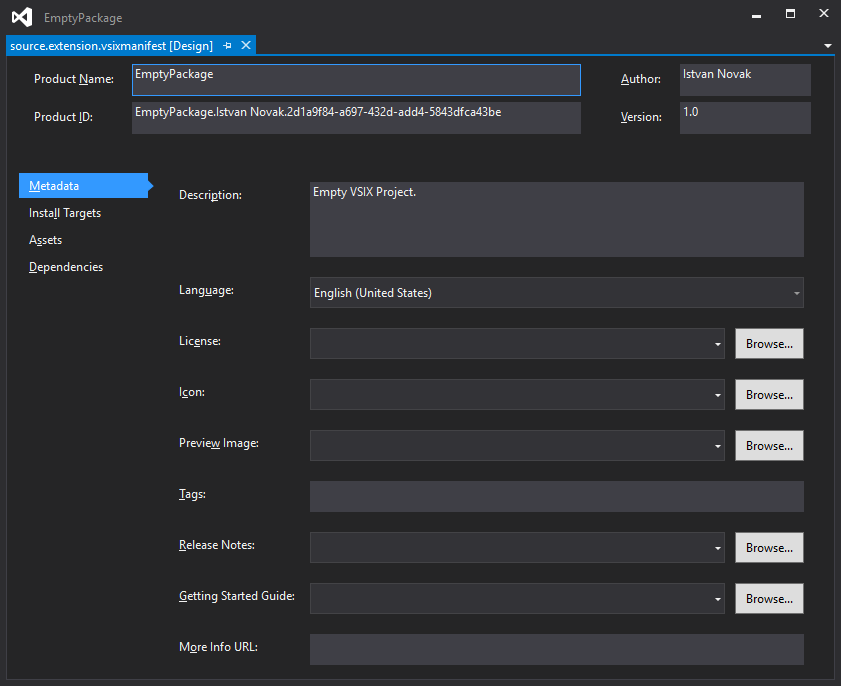
Figure 3: The VSIX metadata in the manifest file
4. In subsequent posts, you will learn the meaning of metadata items. Right now, it is enough to know that each VSIX file—or, with another name, VSIX container—has a set of mandatory information that uniquely identifies the container, namely: Product Name, Author, Product ID, and Version.
5. At this point, the VSIX container is ready to be deployed. If you’d start the project with F5 or Ctrl+F5, The IDE would build the container and deploy it. Nonetheless, it is empty now, and thus it would not integrate anything useful with Visual Studio.
Adding a VSPackage
The VSIX container is lonely without contents to deploy. It’s time to add something that gears up the cogs.
1. In Solution Explorer, right-click the EmptyPackage project node, and select the Add New Item command. When the corresponding dialog opens (Figure 4), select the Visual Studio Package item within the Extensibility category and name the item to EmptyPackage. Click Add.
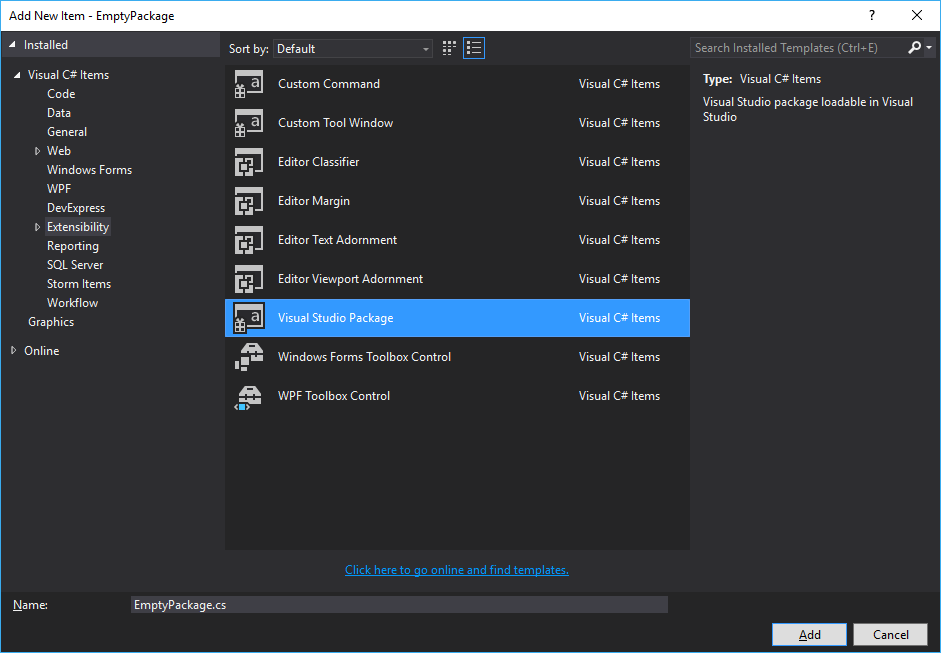
Figure 4: The Add new Item dialog
2. Visual Studio adds new files to the project (as highlighted in Figure 5), and sets up more than two dozen references, including NuGet packages.
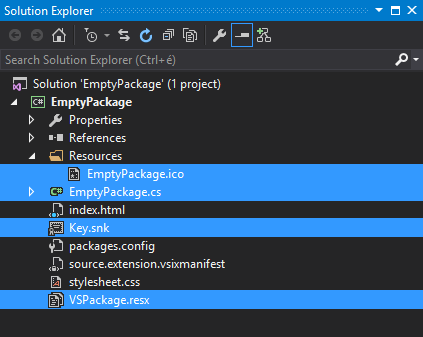
Figure 5: New files related to the freshly created VSPackage
3. Now, you have a package ready to run. Click Ctrl+F5 (or use the Debug | Start Without Debugging command) to try EmptyPackage. First, the IDE builds the project that creates a VSIX container. Next, it starts a new Visual Studio IDE—the Experimental Instance, as shown in Figure 6—, and deploys the VSIX container into this instance.

Figure 6: The Visual Studio Experimental Instance
4. You can check that EmptyPackage is integrated with the VS IDE. Use the Help | About command of the Experimental Instance to list the installed products. As Figure 7 shows, EmptyPackage is among them.
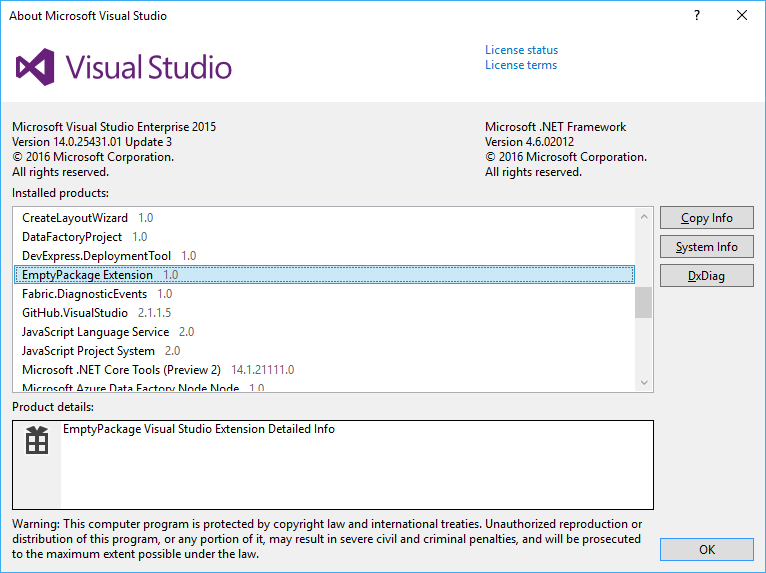
Figure 7: EmptyPackage is installed in the Experimental Instance
Congrats! You have just created your first working Visual Studio Package!
How It Works
When creating the package source file, Visual Studio adds helping comments to the code. I deliberately removed them to allow more concise code listings. You can keep these comments—moreover, I suggest you keep them—for they provide guides while you are learning package development.
By default, Visual Studio puts packages into assemblies with strong names, and signs them with the private key in the Key.snk file. Visual Studio does not insist on strongly-named assemblies; it is a prerequisite if any part of your package goes into the GAC (Global Assembly Cache). If you do not intend to put anything into the GAC, you can remove assembly signing in the Signing page of Project Properties.
The gist of the package is in the EmptyPackage.cs file:
using System.Runtime.InteropServices;
using Microsoft.VisualStudio.Shell;

namespace EmptyPackage
{
    [PackageRegistration(UseManagedResourcesOnly = true)]
    [InstalledProductRegistration("#110", "#112", "1.0", IconResourceID = 400)]
    [Guid(PackageGuidString)]
    public sealed class EmptyPackage : Package
    {
        public const string PackageGuidString = "a101e636-ef0b-4eb4-84bf-fbd328bb6fbd";

        public EmptyPackage()
        {
        }

        protected override void Initialize()
        {
            base.Initialize();
        }
    }
}
The sealed class represents the VSPackage. It derives from the Package class of the Microsoft.VisualStudio.Shell namespace, which is a fundamental type in the Managed Package Framework (MPF). This base class provides its descendant with every crucial behavior of a VSPackage.
By default, a Visual Studio Package is loaded in the IDE on demand—the first time is about to be used. During deployment time packages are only registered (in the Windows system registry). When Visual Studio starts, it reads the registry to collect the installed packages. The PackageRegistration, InstalledProductRegistration and Guid attributes that decorate the EmptyPackage class describe the information to be put into the registry:
| Attribute | Description |
|---|---|
PackageRegistration |
The VSIX installer utility scans types for this attribute to recognize that the type should be registered as a package. In the EmptyPackage project, this attribute sets the UseManagedResourcesOnly flag to tell that all resources used by the package are described in the package assembly and not in a satellite DLL. |
InstalledProductRegistration |
This attribute provides information to be displayed in the Help/About dialog. The constructor of this attribute requires four parameters with the following meanings: The first two strings provide the name and the description of the package. The “#” characters indicate that these values should be looked up in the package resources with the IDs following the # character. The third “1.0” parameter is the product version number. The fourth parameter, IconResourceID, tells which icon to use for the package. These resources (name, description, and icon) should be defined in the VSPackage.resx file. |
Guid |
This attribute’s GUID value defines the unique identifier of the VSPackage; it is used for the registration. Implicitly, the IDE utilizes this ID when referring to the package, too. |
The initialization of the package takes two separate steps. The class constructor should set up those package members that do not need to any connection with the Visual Studio IDE. The overridden Initialize method is invoked when the package is sited in the IDE, and so it can access the resources and operations of the Visual Studio Shell and other packages.
Where We Are
In the next post, you will create a VSPackage with some working code and understand how a package communicates with Visual Studio. You will learn the details of the initialization and understand the role of the Experimental Instance, too.