You often need to create custom user interfaces for tools and utilities you integrate with the Visual Studio IDE. There are several extensibility points to expand the existing user interface with commands (as you learned it in the previous blog post) or output panes (as you tried it in Part #3). When you want to add an entirely new, separate user interface that can be displayed individually, tool windows provide an easy solution.
In this post, you will learn how you can add tool windows to a VSPackage.
We are going to create a very simple package with a single tool window. Start with a new VSIX project—name it SimpleToolWindowPackage—and then, add a new VSPackage to the project—name it SimpleToolWindowPackage, too.
Note: If you do not remember how to carry out these simple steps, go back to Part #2, and read it again.
Adding a Tool Window
In Solution Explorer, right-click the project node, and with the Add New Item command, add a new Custom Tool Window item to the project with the WelcomeToolWindow name, as Figure 1 shows.
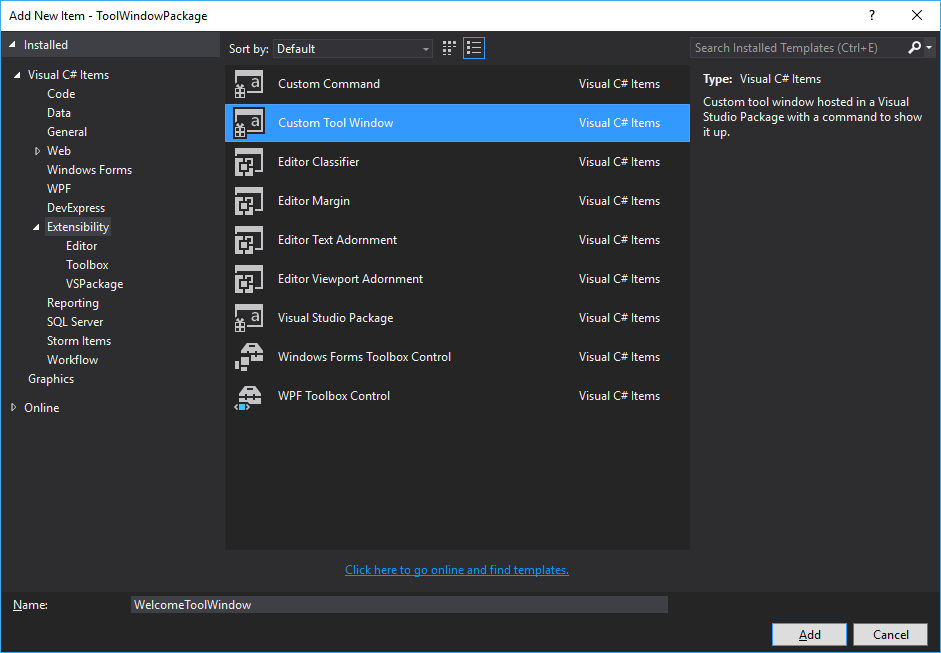
Figure 1: Adding a New Custom Tool Window to the package
The wizard that belongs to this item template adds five files to the project, and modifies the SimpleToolWindowPackage file, too. Without any further modification, the project is ready to run. Start the package with Ctrl+F5. As Figure 2 shows, it adds a new entry to the View | Other Windows menu.
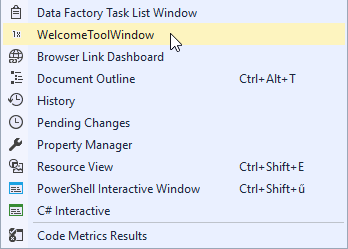
Figure 2: The command that displays the tool window
When you click the menu item, the IDE displays the new tool window (Figure 3). Though this window is floating, you can dock it to the edges of the IDE or other windows within the shell—just like any other tool windows that already exists in Visual Studio.
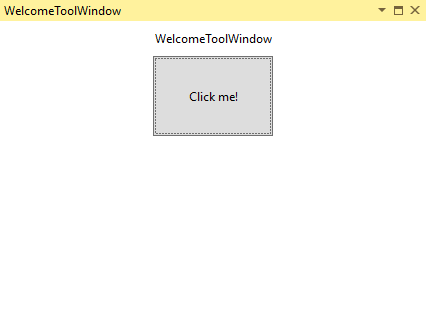
Figure 3: The new tool window
The functionality of the tool window is very simple. When you click its button, is pops up a message (Figure 4).
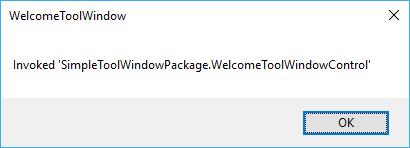
Figure 4: The popup message of the tool window
Displaying a Tool Window
When you added the new tool window item to the project, the Add New Item wizard appended six files to the project, as Figure 5 shows.
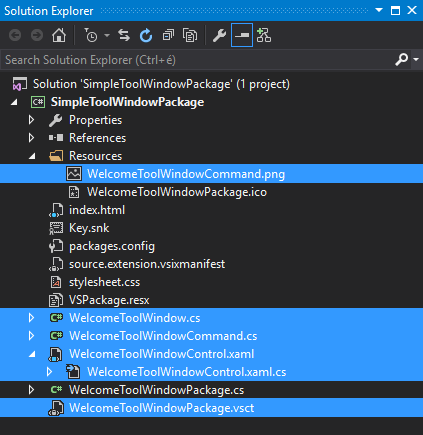
Figure 5: New files added to the project for a tool window
Three of them—WelcomeToolWindowCommand.png, WelcomeToolWindowCommand.cs, and WelcomeToolWindowPackage.vsct, respectively—are custom command files. The three other new files define the tool window (WelcomeToolWindow.cs) and its user interface (WelcomeToolWindowControl.xaml, WelcomeToolWindowControl.xaml.cs).
They custom command files follow the same semantics you already learned in Part #4. Nonetheless, there are a few differences. The new custom command displays a tool window—and not a message, as it did in the previous post:
using System;
using System.ComponentModel.Design;
using Microsoft.VisualStudio.Shell;
using Microsoft.VisualStudio.Shell.Interop;

namespace SimpleToolWindowPackage
{
    internal sealed class WelcomeToolWindowCommand
    {
        public const int COMMAND_ID = 0x0100;

        public static readonly Guid CommandSet = new Guid("1f434474-c20f-4ac1-b3a6-e1de8341ce28");

        private readonly Package _package;

        private WelcomeToolWindowCommand(Package package)
        {
            if (package == null)
            {
                throw new ArgumentNullException(nameof(package));
            }

            _package = package;

            var commandService = ServiceProvider.GetService(typeof(IMenuCommandService))
                as OleMenuCommandService;
            if (commandService == null) return;

            var menuCommandID = new CommandID(CommandSet, COMMAND_ID);
            var menuItem = new MenuCommand(ShowToolWindow, menuCommandID);
            commandService.AddCommand(menuItem);
        }

        public static WelcomeToolWindowCommand Instance { get; private set; }

        private IServiceProvider ServiceProvider => _package;

        public static void Initialize(Package package)
        {
            Instance = new WelcomeToolWindowCommand(package);
        }

        private void ShowToolWindow(object sender, EventArgs e)
        {
            // Get the instance number 0 of this tool window. This window is single instance so this instance
            // is actually the only one.
            // The last flag is set to true so that if the tool window does not exists it will be created.
            var window = _package.FindToolWindow(typeof(WelcomeToolWindow), 0, true);
            if (window?.Frame == null)
            {
                throw new NotSupportedException("Cannot create tool window");
            }

            var windowFrame = (IVsWindowFrame)window.Frame;
            Microsoft.VisualStudio.ErrorHandler.ThrowOnFailure(windowFrame.Show());
        }
    }
}
Here, the command registers the ShowToolWindow method as the command’s callback—thus, when the user activates the command, the IDE runs ShowToolWindow.
Visual Studio tool windows can have a single instance or even multiple instances. To display, hide, close, move, dock, float a tool window within the shell—and for a few other operations—, we need to access its window frame—represented by the IVsWindowFrame interface. The Package base class has a FindToolWindow method that undertakes this job:
var window = _package.FindToolWindow(typeof(WelcomeToolWindow), 0, true);
The method accepts three arguments. The first specifies the type of the class that describes the tool window—in our project this is the WelcomeToolWindow class. The second argument tells the instance number we intend to access. In this project, we implement a singleton tool window, so we use the 0 instance identifier. The last Boolean argument’s true value specifies that the method should create the tool window instance, provided that does not exist.
FindToolWindow returns a ToolWindowPane object that represents the tool window itself. To display the window, we invoke the Show method of its frame:
if (window?.Frame == null)
{
    throw new NotSupportedException("Cannot create tool window");
}

var windowFrame = (IVsWindowFrame)window.Frame;
Microsoft.VisualStudio.ErrorHandler.ThrowOnFailure(windowFrame.Show());
Note: The in the code above I used the 0 instance identifier, you can use an arbitrary ID. The important thing is that you should always use the same ID; otherwise, the shell would create new tool windows for every separate ID.
Declaring a Tool Window
As I just mentioned, a tool window type is represented by a class declaration. In this project, this is the WelcomeToolWindow class:
using System.Runtime.InteropServices;
using Microsoft.VisualStudio.Shell;

namespace SimpleToolWindowPackage
{
    [Guid("20cdde00-f50d-4560-9160-6d4ee499d0ec")]
    public class WelcomeToolWindow : ToolWindowPane
    {
        public WelcomeToolWindow() : base(null)
        {
            Caption = "WelcomeToolWindow";
            Content = new WelcomeToolWindowControl();
        }
    }
}
The code is pretty concise. The Managed Package Framework supports only tool window classes that derive from the ToolWindowPane class of the Microsoft.VisualStudio.Shell namespace. Within the shell the COM technology is used, and—accordingly—every COM object type must have its unique GUID. Here we specify this ID with the Guid attribute. In the constructor, we have to invoke the base class’s constructor with passing null.
Note: The base class accepts a System.IServiceProvider object that the created window can use to obtain services from the shell. The Managed Package Framework implementation does not allow the tool window to add itself to the shell through services. Thus we need to pass null when invoking the constructor of the base class.
With the Caption property, we can set the title of the tool window. The Content property defines an object that can handle the UI of the window. We set it to a new instance of WelcomeToolWindowControl, which is a WPF user control instance.
Note: The Content property’s value is a System.Object. The Managed Package Framework checks the run time type of the value against several alternatives to display the UI of the tool window. A WPF UIElement is one of these options.
The Tool Window UI
There is nothing special with the WelcomeToolWindowControl that defines the UI we use in the project. Its XAML definition is as simple as you expect:
<UserControl x:Class="SimpleToolWindowPackage.WelcomeToolWindowControl"
             xmlns="http://schemas.microsoft.com/winfx/2006/xaml/presentation"
             xmlns:x="http://schemas.microsoft.com/winfx/2006/xaml"
             xmlns:mc="http://schemas.openxmlformats.org/markup-compatibility/2006"
             xmlns:d="http://schemas.microsoft.com/expression/blend/2008"
             Background="{DynamicResource VsBrush.Window}"
             Foreground="{DynamicResource VsBrush.WindowText}"
             mc:Ignorable="d"
             d:DesignHeight="300" d:DesignWidth="300"
             Name="MyToolWindow">
    <Grid>
        <StackPanel Orientation="Vertical">
            <TextBlock Margin="10" HorizontalAlignment="Center">
              WelcomeToolWindow
            </TextBlock>
            <Button Content="Click me!" Click="button1_Click" Width="120"
              Height="80" Name="button1"/>
        </StackPanel>
    </Grid>
</UserControl>
Nonetheless, as the highlighted lines in the markup show, you can use predefined DynamicResource bindings to set colors and other visual resources to match the current theme settings of the IDE. With these settings, the WelcomeToolWindowControl applies the appropriate background and text colors with both the light and back IDE themes.
Note: For the full list of VsBrush resources, check this link: https://msdn.microsoft.com/en-us/library/microsoft.visualstudio.shell.vsbrushes.aspx. The VsBrushes static class declares all resource keys you can use with the VsBrush resource prefix. When you convert VsBrushes static properties to VsBrush resource keys, just omit the “Key” suffix from the property name. For example, the VsBrushes.WindowKey property tells that you can use the VsBrush.Window resource name with DynamicResource.
There is nothing surprising in the code behind the markup:
using System.Windows;
using System.Windows.Controls;

namespace SimpleToolWindowPackage
{

    public partial class WelcomeToolWindowControl : UserControl
    {
        public WelcomeToolWindowControl()
        {
            InitializeComponent();
        }

        private void button1_Click(object sender, RoutedEventArgs e)
        {
            MessageBox.Show(
                string.Format(System.Globalization.CultureInfo.CurrentUICulture,
                "Invoked '{0}'", this),
                "WelcomeToolWindow");
        }
    }
}
Where We Are
You can do many more things with Visual Studio tool windows, such as adding toolbars and information bars, hosting commands, listen to shell events, manage the initial layout, persist tool window state, and so on. In this blog post, I only showed you the simple things. Stay tuned, in a future blog post we will dive into the nitty-gritty details, too.
In the next post, you will learn about option pages.