When you implement an extension package for Visual Studio, you often need to provide UI to allow the user to manage package specific settings. Though you can create your custom UI from scratch, there is an easier and faster way to integrate these settings with the IDE—by adding options pages.
In this post, you will learn the fundamentals of implementing them.
Creating the Sample Package
Let’s start with creating a VSPackage that integrates a tool window. Later, we will add options pages that allow the user to configure the text size and color of the message in the tool window.
Follow these steps:
1. Start a new Visual Studio project and create a VSIX Project—name it SimpleOptionsPagesPackage. 2. Add a Visual Studio Package item (OptionsPagesPackage.cs) to the project. 3. Create a new Custom Tool Window—name the file GreetingToolWindow.cs.
Changing the Tool Window UI
At this point, you have a very simple VSPackage that shows the same tool window you created in Part #5.
4. Modify the GreetingToolWindow.xaml file to change the UI:
<UserControl x:Class="SimpleOptionsPagesPackage.GreetingToolWindowControl"
             xmlns="http://schemas.microsoft.com/winfx/2006/xaml/presentation"
             xmlns:x="http://schemas.microsoft.com/winfx/2006/xaml"
             xmlns:mc="http://schemas.openxmlformats.org/markup-compatibility/2006"
             xmlns:d="http://schemas.microsoft.com/expression/blend/2008"
             Background="{DynamicResource VsBrush.Window}"
             Foreground="{DynamicResource VsBrush.WindowText}"
             mc:Ignorable="d"
             d:DesignHeight="300" d:DesignWidth="300"
             Name="MyToolWindow">
    <Grid>
        <TextBlock x:Name="Welcome" Margin="10" HorizontalAlignment="Center"
                   VerticalAlignment="Center" FontSize="24"
                   Background="{DynamicResource VsBrush.Window}"
                   Foreground="{DynamicResource VsBrush.WindowText}">
            Welcome in Visual Studio!
        </TextBlock>
    </Grid>
</UserControl>
5. Remove the unused button1_Click method from the GreetingToolWindow.xaml.cs file:
namespace SimpleOptionsPagesPackage
{
    using System.Windows.Controls;

    public partial class GreetingToolWindowControl : UserControl
    {
        public GreetingToolWindowControl()
        {
            this.InitializeComponent();
        }
    }
}
Now, the modified tool window package is ready to run. With the View | Other Windows | GreetingToolWindow command you can check the new outlook (Figure 1) when running the package in the Experimental Instance.
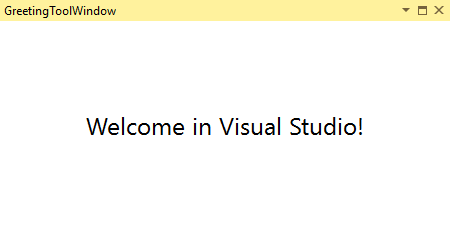
Figure 1: The modified tool window
Adding an Options Page Grid
The easiest way to provide a setting UI is a property grid that looks similar to the Properties window in the VS IDE. You only need to define the structure of configuration settings. Add a new C# file to the project (GreetingsOptionsGrid.cs):
using System.ComponentModel;
using Microsoft.VisualStudio.Shell;

namespace SimpleOptionsPagesPackage
{
    public class GreetingsOptionsGrid: DialogPage
    {
        [Category("Text settings")]
        [DisplayName("Font size")]
        [Description("Size of the greeting text")]
        public int TextSize { get; set; } = 32;

        [Category("Text settings")]
        [DisplayName("Color")]
        [Description("Color of the greeting text")]
        public string TextColor { get; set; } = "Red";
    }
}
The GreetingsOptionsGrid class derives from the DialogPage class (it is declared in the Microsoft.VisualStudio.Shell namespace), which takes care of creating the property grid UI according to the class properties and its decorations.
Each property sets the Category, DisplayName, and Description attributes that set up the visual appearance of the property grid.
You need to bind the options page to OptionsPagesPackage. Add the ProvideOptionPage line to the adornments of the package class:
[PackageRegistration(UseManagedResourcesOnly = true)]
[InstalledProductRegistration("#110", "#112", "1.0", IconResourceID = 400)]
[Guid(PackageGuidString)]
[ProvideMenuResource("Menus.ctmenu", 1)]
[ProvideToolWindow(typeof(GreetingToolWindow))]
[ProvideOptionPage(typeof(GreetingsOptionsGrid), "Greetings Package",
  "Greetings Page", 0, 0, true)]
public sealed class OptionsPagesPackage : Package
{
    // ...
}
Now, as you run the modified package in the Experimental Instance (Ctrl+F5), you can observe that the freshly created options page (Figure 2).
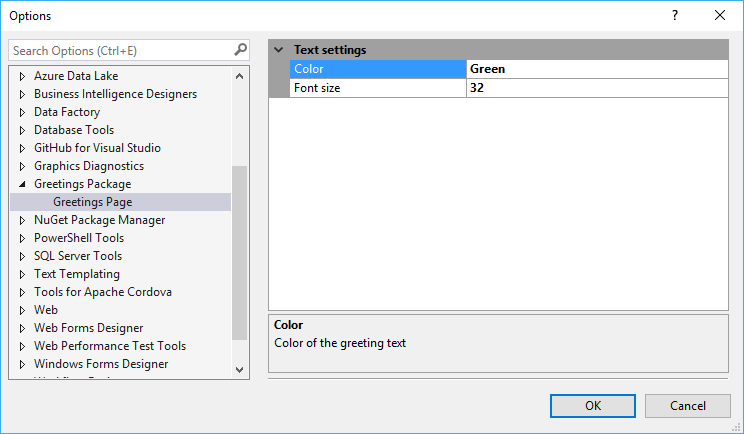
Figure 2: The options page of the Greetings Package
Hint: Check how the property adornments of the GreetingsOptionsGrid class show up in the UI.
The package-specific options page behaves just like the ones shipped with Visual Studio out-of-the-box. As Figure 3 shows, the IDE provides search support through the Quick Launch (Ctrl+Q) command.
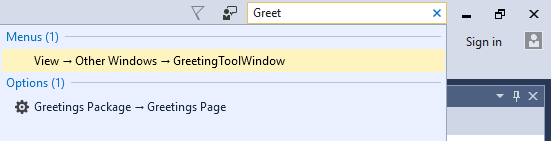
Figure 3: The Greetings Page shows up in Quick Launch search results
How It Works
Just like packages and their related tool windows, options pages are also registered with Visual Studio when you deploy the corresponding VSIX package. The goal of this registration is to prepare the IDE for loading your package when the user displays a page in the Options dialog (with the Tools | Options command).
After starting the IDE, you can display the Options dialog and browse among the pages. The VS Shell does not load the package unless you select one of its options pages—provided it has not been loaded earlier.
The ProvideOptionsPage attribute has several constructors. The one we used has six arguments:
[ProvideOptionPage(typeof(GreetingsOptionsGrid), "Greetings Package",
  "Greetings Page", 0, 0, true)]
The first is a type that represents the class implementing the options page. The second and third arguments register the category, and the subcategory of the page (check Figure 2), respectively. These are non-localized names. You can provide localized names with resources; in this case, the fourth and fifth argument specify the corresponding resource IDs. The true value passed in the sixth argument tells that the options page can be accessed through the Visual Studio automation mechanism.
Note: At this point, it does not matter whether you use the true or false value of the sixth argument. This sample works with both. For future use, the best way is always to pass true.
The options page now stores the information that we can set in the Options dialog, but we have not used these settings yet. Let’s modify the code so that we can reflect the changes of the text settings in the tool window.
The Package base class—OptionsPagesPackage derives from this class—provides a method, GetDialogPage, which can query the information stored in a particular options page. We have several alternative ways to convey this info to the custom control of the tool window’s UI. In this sample, I just pass down the package instance to the control and read the text settings there.
Change the body of the GreetingToolWindowControl class (GreetingToolWindowControl.xaml.cs):
using System.Windows.Media;
using System.Windows.Controls;

namespace SimpleOptionsPagesPackage
{
    /// <summary>
    /// Interaction logic for GreetingToolWindowControl.
    /// </summary>
    public partial class GreetingToolWindowControl : UserControl
    {
        private readonly GreetingToolWindow _toolWindow;

        /// <summary>
        /// Initializes a new instance of the <see cref="GreetingToolWindowControl"/> class.
        /// </summary>
        public GreetingToolWindowControl(GreetingToolWindow toolWindow)
        {
            _toolWindow = toolWindow;
            InitializeComponent();
            Loaded += ToolWindowLoaded;
        }

        private void ToolWindowLoaded(object sender, System.Windows.RoutedEventArgs e)
        {
            var color = ColorConverter.ConvertFromString(TextColor);
            if (color != null)
            {
                Welcome.Foreground = new SolidColorBrush((Color)color);
            }
            Welcome.FontSize = TextSize;
        }

        private OptionsPagesPackage Package => _toolWindow.Package as OptionsPagesPackage;

        private int TextSize => (Package?.GetDialogPage(typeof(GreetingsOptionsGrid))
            as GreetingsOptionsGrid)?.TextSize ?? 12;

        private string TextColor => (Package?.GetDialogPage(typeof(GreetingsOptionsGrid))
            as GreetingsOptionsGrid)?.TextColor ?? "Red";
    }
}
The constructor receives the GreetingToolWindow instance—the one that represents the tool window within the IDE—so that it can access the package instance through the tool window’s Package property.
The private TextSize and TextColor properties obtain the options page setting and provide a safe conversion to meaningful values—to avoid problems from faulty settings, such as an invalid color name.
The ToolWindowLoaded event handler method takes care of applying the text settings.
Note: In this implementation, for the sake of simplicity, you should close and then display the GreetingsToolsWindow to let the text settings be updated according to the current option values.
This solution requires passing the tool window instance to its UI. Thus, we need to modify the GreetingToolWindow class, too:
public class GreetingToolWindow : ToolWindowPane
{
    public GreetingToolWindow() : base(null)
    {
        this.Caption = "GreetingToolWindow";
        this.Content = new GreetingToolWindowControl(this);
    }
}
Now, you can try to provide new text settings in the options page (Figure 4).
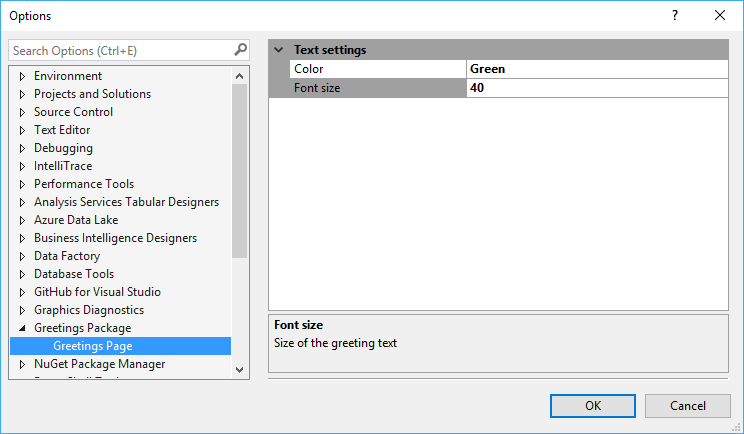
Figure 4: Changed text settings
When you close and then display the tool window again (Figure 5), it shows the welcome text with the new settings.

Figure 5: The tool window with the new text settings
Where We Are
In this post, you learned how easy is to create a simple options page with a property grid. In the next post, you will learn to replace the property grid with customized UI.