After you created your Z80 Assembler program, you can easily export it into a .TAP or .TZX file so that you
could load it into a ZX Spectrum emulator, or into a real hardware, such as a ZX Spectrum Next, or ZX Spectrum
(with the help of TZXDuino or CASDuino hardware).
To try how easy it is, create a simple Z80 program:
- Create a new ZX Spectrum 48 project (see details here).
The
CodeFilesproject of the folder contains aCode.z80asmfile. Clear the contents of that file, and type this concise program:
start:
    .org #8000
    ld a,3
    out (#fe),a
    jp #12a2
- In Solution Explorer, right-click the
Code.z80asmfile, and invoke the Run Z80 program command (or use the Ctrl+M, Ctrl+R double shortcut keys):
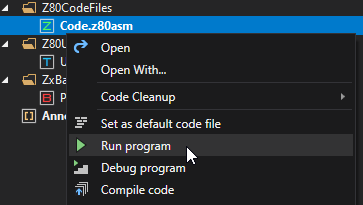
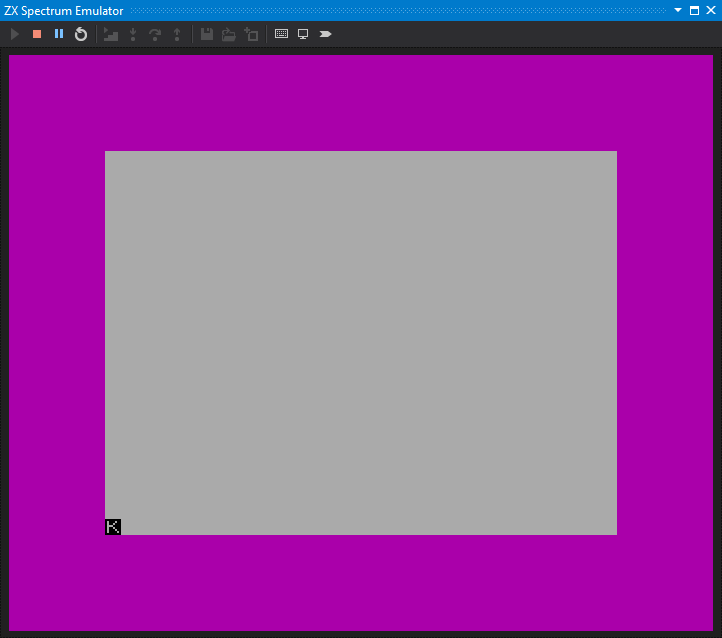
This command compiles the Z80 assembly code to binary machine code, starts (or restarts) the Spectrum virtual machine, injects the binary code, and runs it:
You can easily export the code with these steps:
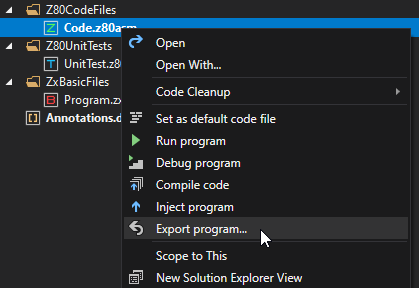
- In Solution Explorer, right-click the
Code.z80asmfile, and invoke the Export Z80 program command:
- The IDE pops up the Export Z80 Program dialog:
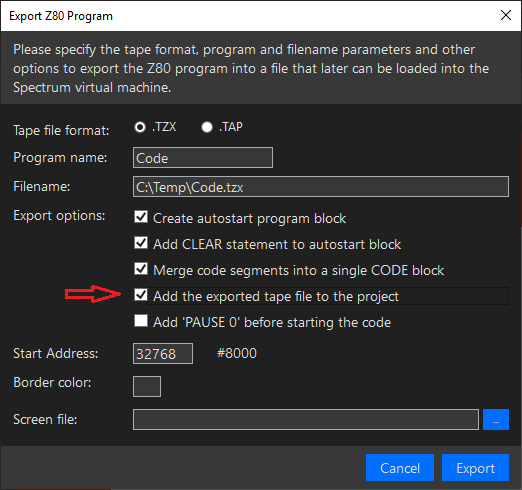
You can change the attributes of the exported program. The default settings of the dialog will create a loader program that automatically loads and runs the code. Beside the default options, I set the Add the exported tape file to the project checkbox.
- Click Export.
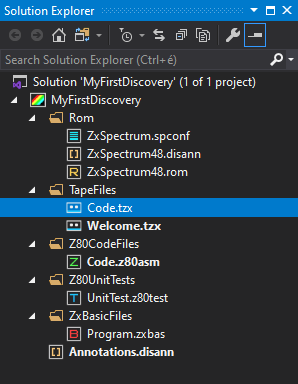
Now, you can find the exported code file in the C:\Temp folder (Code.tzx), and also in your project, within the TapeFile folder:
Auto-loaders for ZX Spectrum 48K
The Export program command function creates a simple auto-loader that loads the code file, and starts it:
10 CLEAR 24575 : LOAD "" CODE : RANDOMIZE USR 24576
Note: The above code belongs to a program that starts at #6000.
When you use a loading screen and set a load-time border, the auto-loader is a bit more complicated:
10 CLEAR 24575 : BORDER 4 : LET o = PEEK 23739 : LOAD "" SCREEN$ : POKE 23739,111 :
LOAD "" CODE : POKE 23739,o : RANDOMIZE USR 24576
Setting the byte at 23739 to 111 (“o”) prevents the load messages from being written to the main screen.
Note: The above code belongs to a program that starts at #6000. The user has set the Border value in the Export dialog to 4 and selected a screen file.
Auto-loaders for ZX Spectrum 128/+2/+3
When using the ZX Spectrum 128K model, you may create a Z80 Assembly code that uses the BANK pragma. If you do not, the Export program command generates the same auto-loader code as if you’d use a ZX Spectrum 48K model.
As soon as the compiled output contains at least a single bank, SpectNetIDE applies another loader that reads each bank from a separate code file. With the help of a 21-byte long paging subroutine, it moves the code to the appropriate bank. This is how the simples form of this code looks like (it gets a bit more complicated when you use the border or screen file export options):
10 REM 012345678901234567890
20 CLEAR 24575 : LET c = (PEEK 23635 + 256 * PEEK 23636) + 5
30 FOR i = 0 TO 20 : READ d : POKE c + i, d : NEXT i
40 LOAD "" CODE
50 READ b
60 IF b = 8 THEN GO TO 80
70 POKE 23608,b : RANDOMIZE USR c : LOAD "" CODE : GO TO 50
80 RANDOMIZE USR 24576 : STOP
90 DATA 243, 58, 92, 91, 230, 248, 71, 58, 56, 92, 176, 50, 92, 91, 1, 253, 127, 237,  121, 251, 201
100 DATA 2,6,8
Short explanation:
- Line #20 stores the location of the first
0in line #10, as will be the starting address of the code that puts a particular page into slot 3. - Line #30 reads the machine code bytes (from line #90) and stores it to the memory area of line #10, as the REM statement is just a placeholder.
- Line #40 reads the code into normal memory. Your machine code needs to have some initial/startup code.
- Lines #50, #60, and #70 takes care that all banks are read from code files. The numbers of exported banks are stored in line #100; the last
8is a terminator. - Line #80 starts the user code.
Note: The above code belongs to a program that starts at #6000.
Auto-Export
You can configure SpectNetIDE to automatically export the result of successful compilation whenever you execute any of the Run program, Debug program, Compile code, or Inject code commands. By default, this option is turned off. Nonetheless, you can quickly activate it in the Tools | Options dialog through the Export after compile options:
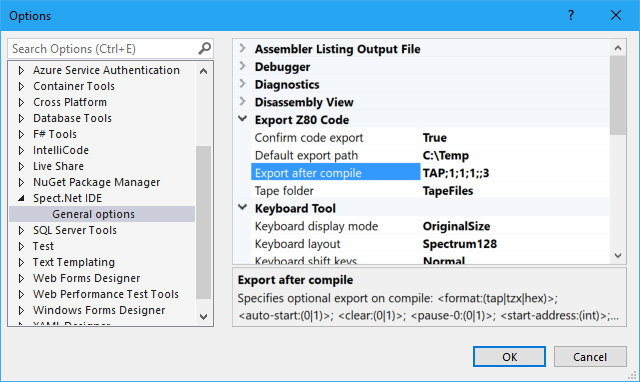
This option allows you to define up to seven parameters separated by semicolons. The first parameters (tape file format) is mandatory, and the others are optional. You can omit any parameters from the and of the list, and use an empty one to indicate you intend to use that with its default value. These are the available parameters:
- #1: Tape file format. You need to use any of these values: TAP, TZX, or HEX (Intel Hex format).
- #2: Auto-Start Loader. 0: off, 1: on (default).
- #3: Apply CLEAR flag. 0: off, 1: on (default).
- #4: Apply PAUSE 0 flag. 0: off (default), 1: on.
- #5: Start Address. Use the specified address to start the code. If you leave it empty, the export will use the entry address specified during compilation. Default: empty.
- #6: BORDER Color: Specify a BORDER color (0-7) to apply. Default: no border color.
- #7: Screen file: Specify the path of the screen file (absolute path). Default: no screen file.
For example, the TAP;1;1;;3 settings in the screenshot above creates a TAP file with auto-start loader, CLEAR, and magenta border color. You can write it even shorter: TAP;;;;3.
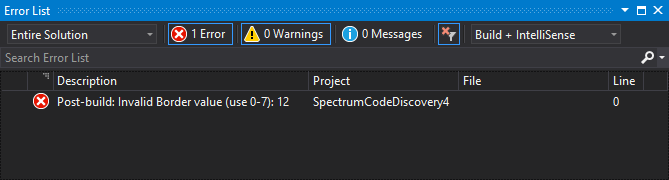
The exported file goes into the .SpectNetIde/Export folder within your project folder. Should you use an invalid option, the auto-export command would show the related error. For example, the TAP;;;;12 parameter list would raise this error:
If you are using Build Tasks, the auto-export function runs right after the compile phase, before the post-build task. So, in your post-build task, you can use the exported file.