To use ZX BASIC — as it is a separate product from SpectNetIDE, first, you should install it on your computer. The previous tutorial explains the setup procedure.
SpectNetIDE supports ZX BASIC (Boriel’s BASIC). In this tutorial, you will learn how to create and run a ZX BASIC program.
To create your first ZX BASIC program, follow these steps:
- Create a new ZX Spectrum 48 project (see details here).
The
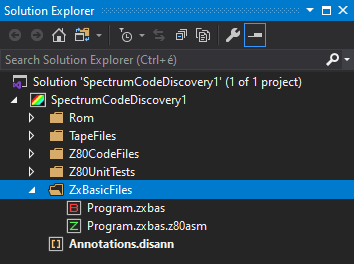
ZxBasicFilesfolder of the project contains aProgram.zxbasfile:
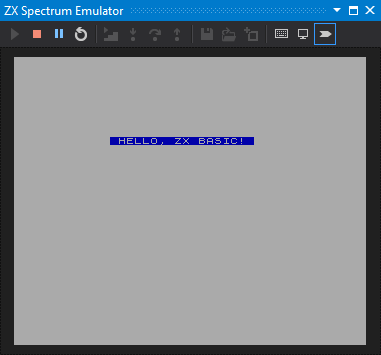
cls
print at 4,6; ink 7; paper 1; flash 1;" HELLO, ZX BASIC! "
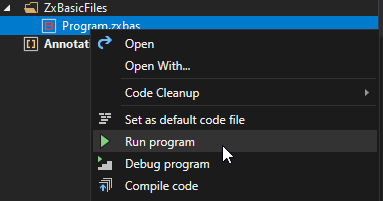
- Right-click the
Program.zxbasfile in Solution Explorer, and use the Run program command.
The IDE compiles the ZX BASIC code, displays the emulator window, and runs the code:
Note: You can use the Ctrl+M, Ctrl+R double shortcut keys to execute the Run Z80 program.
Let’s create a new ZX BASIC program!
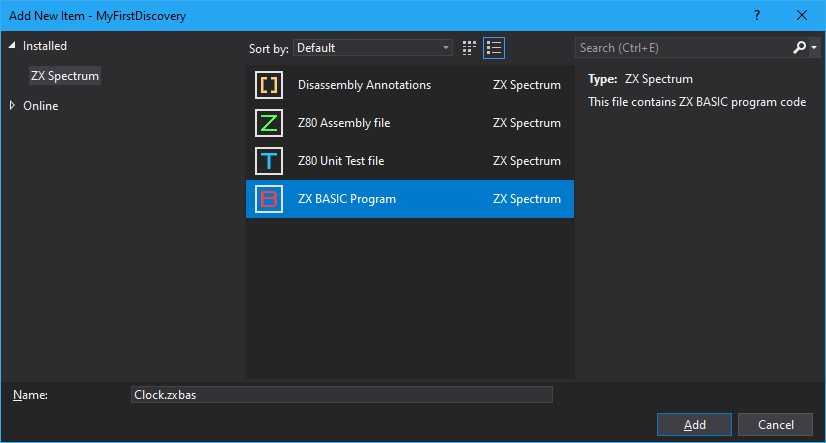
- Right-click the ZxBasicFiles folder in Solution Explorer, and select the Add → New item command:
-
Select the ZX BASIC Program item type, set the name to
Clock.zxbas, and click Add. -
Type (copy) this code into the new
Clock.zxbasfile:
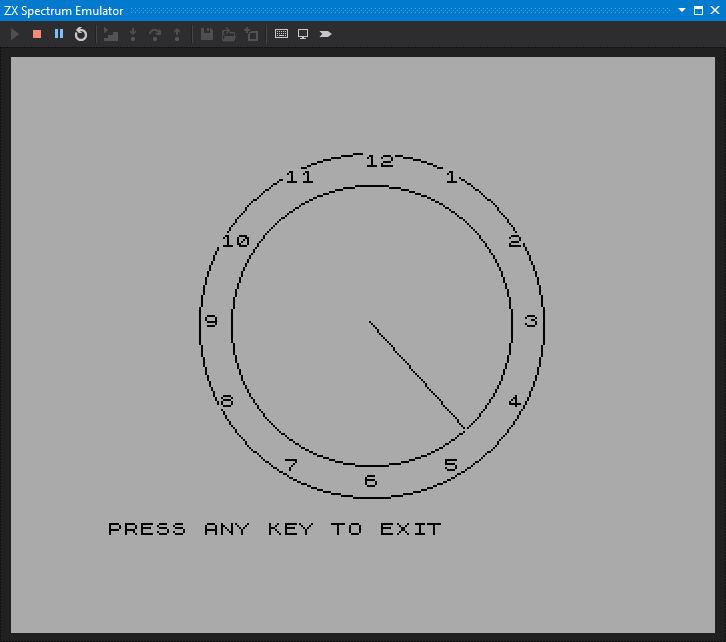
CLS
CIRCLE 132, 105, 86
FOR n = 1 to 12
    PRINT AT 10 - (10 * COS(n * PI / 6) - 0.5), 16 + (0.5 + 10 * SIN(n * PI / 6)); n
NEXT n
CIRCLE 132, 105, 70

PRINT AT 23, 0; "PRESS ANY KEY TO EXIT";

FUNCTION t AS ULONG
    RETURN INT((65536 * PEEK (23674) + 256 * PEEK(23673) + PEEK (23672))/50)
END FUNCTION

DIM t1 as FLOAT

OVER 1
WHILE INKEY$ = ""
    LET t1 = t()
    LET a = t1 / 30 * PI
    LET sx = 72 * SIN a : LET sy = 72 * COS a
    PLOT 131, 107: DRAW sx, sy

    LET t2 = t()
    WHILE (t2 <= t1) AND (INKEY$ = "")
        let t2 = t()
    END WHILE

    PLOT 131, 107: DRAW sx, sy
END WHILE
- Run the program (either with the Run program command or the Ctrl+M, Ctrl+R shortcut keys):
Note: For more details about ZX BASIC, visit this link: https://zxbasic.readthedocs.io/. You can find more example within the
examplesfolder within your ZX BASIC instalation folder, or here.
ZX BASIC Compilation
When you run any command that requires compiling a ZX BASIC file, SpectNetIDE carries out the compilation in two steps:
- First, it transpiles the ZX BASIC program to Z80 Assembly
- Then, it compiles the Z80 Assembly to machine code that runs in SpectNetIDE.
By default, the IDE stored the temporary Z80 Assembly file in a working folder within the project structure. However, you can add it to the project files, if you want to work with it:
Open the Tools → Options dialog. Under the ZX BASIC Options category set the Store generated .z80asm file option to true:
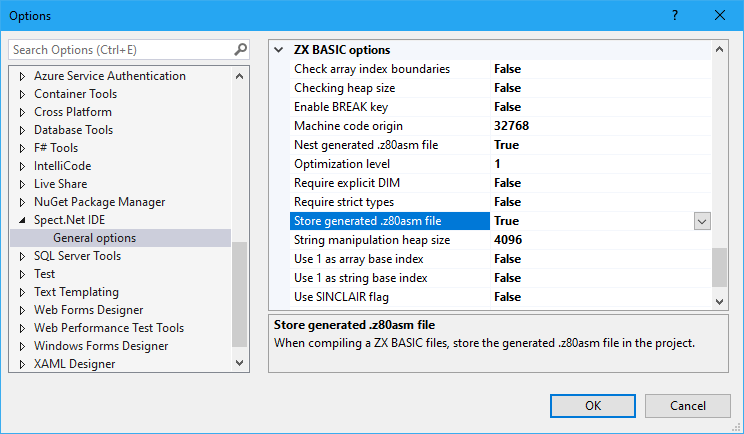
From now on, the compilation will add the generated Z80 Assembly file to the project folder, in the same folder as the ZX BASIC file:
You can use the .z80asm file the same way as if you had created it manually.
Alternatively, you can assign the generated .z80asm file to be the nested (child) project item of the .zxbas files by setting the Nest generated .z80asm file option to true:

Remove the generated .zxbas.z80asm file, and next time you compile the ZX BASIC file, it will be the child of the ZX BASIC file:

Note: Though the icon of the nested file does not indicate that it is a standard
.z80asmfile — this is a Visual Studio limitation — you can still use the file normally. However, you cannot mark it as the default code file.
When you examine the .z80asm file generated during a ZX BASIC compilation, it starts with a .zxbasic pragma like this snippet shows:
    .zxbasic
    org 32768
    ; Defines HEAP SIZE
ZXBASIC_HEAP_SIZE EQU 4096
__START_PROGRAM:
    di
    push ix
    push iy
    exx
    push hl
    ...
The pragma instructs the Z80 Assembler to handle this code file with special options:
- Label and symbol names are case-sensitive. (Normally, those are case-insensitive.)
- All labels within a
PROCare global unless specified local explicitly withLOCAL. (Normally, labels in aPROCare local by default.) - The assembler handles
DEFBandDEFMpragmas in a flexible way. While normallyDEFBallows declaring numeric values andDEFMstrings, in ZX BASIC modeDEFBcan use strings too andDEFMmay declare numeric values besides strings.
ZX BASIC compiles the code as a subroutine that can be CALL-ed. Z80 Assembler creates and injects code that can be started with jumping to the start address. The .zxbasic pragma tells the IDE that the compiled code should be called as a subroutine. When you inject and run ZX BASIC code, the virtual machine returns to the $12AC (ZX Spectrum 48 main execution cycle) address and waits for a keypress. When any key is pressed, it clears the screen.
Option Comments
You can define and pass compilation options to the ZX BASIC compiler (ZBX.EXE utility). To define them, you need to use the @options syntax in the first single line comment (REM or ') in the main file of your ZX BASIC program, like this:
REM @options --array-base=1 --string-base=1 -O3 -H 2100 -S 24600
Note: You can use either @options or @OPTIONS. Nonetheless, the compiler considers only the very firts comments, others are ignored.
With the @options comment, you can use the command line syntax. SpectNetIDE does not parse the command line options you declare, it simply passes them to the compiler. To ensure your code compiles the way SpectnetIDE can handle it, do not use these command line options:
-h,--help(help)-d,--debug-o,--output(output file, SpectNetIDE will fill it for you)-T,--tzx(TZX format)-t,--tap(TAP format)-B,--BASIC-a,--autorun-A,--asm(ASM format, SpectNetIDE automatically adds it)-e,--errmsg(STDERR)-E,--emit-backend-m,--mmap