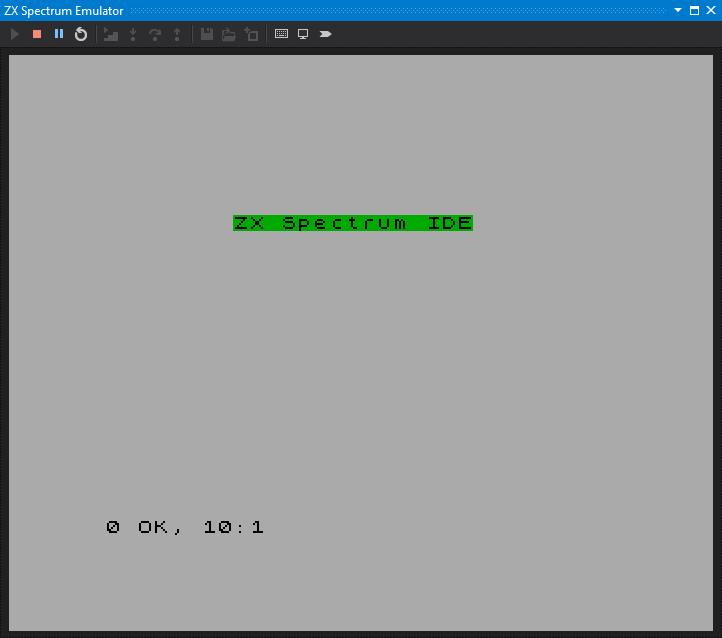
SpectNetIDE would not be useful without an emulator to develop programs. The ZX Spectrum Emulator tool window shows the screen of the embedded ZX Spectrum virtual machine that runs in the background.
As you see, the toolbar at the top of the window contains buttons to control the virtual machine. A few of these buttons have customizable shortcut keys that you can configure in the Tools | Options dialog, in the Environment | Keyboard tab, as you can learn from the Customizing Shortcut Keys section.
Start

This button turns of the virtual machine if it stopped, or continues running it if the machine is stopped.
As you see, the toolbar at the top of the window contains buttons to control the virtual machine.
Default shortcut: Ctrl+M, S
Stop

Immediately turns off the virtual machine. It is as if you turned the hardware off.
Default shortcut: Ctrl+M, Ctrl+S
Pause

You can pause the running virtual machine at any time. Pausing suspends the execution, and the emulator-related tool windows display the state of the virtual machine, such as the current register values, the memory contents, or the execution point in the Disassembly view.
When you use step-by-step debugging, the virtual machine pauses every time it reaches a new breakpoint.
Default shortcut: Ctrl+M, Ctrl+space
Restart

Restarts the virtual machine, just as if you turned it off and on again.
Start Debugging

You can start the virtual machine in debug mode. In this mode, the virtual machine pauses when it reaches a breakpoint (and the optional breakpoint condition is satisfied). If you run the virtual machine with Start, it won’t pause at breakpoints.
Default shortcut: Ctrl+M, D
Note: The caption of the ZX Spectrum Emulator window shows the (Debugging) label when it runs in debug mode.
Step-Into

While the machine is paused, the Step-Into function executes the next Z80 instruction. If the subsequent operation is a subroutine call (such as CALL or RST), Step-Into pauses at the first operation of the subroutine. Should the next one be a block instruction (such as LDIR), Step-Into breaks after the first loop of the block. Thus, if the block takes ten iterations, you have to Step-Into ten time to get to the following operation.
Default shortcut: Ctrl+M, F11
Step-Over

Step-Over works the same for most instructions as Step-Into. Nonetheless, if the next operation is a CALL (or RST), Step-Over executes the entire subroutine and pauses at the next instruction following the call. If there’s a block instruction (e.g. LDIR), Step-Over breaks at the next statement, completing the entire block operation.
Default shortcut: Ctrl+M, F10
Note: If a subroutine call manipulates the stack and returns to somewhere else, Step-Over may not pause at the location you expect.
Step-Out

When you are within a subroutine call, Step-Out continues the execution flow until the current subroutine returns to the caller, and pauses the machine right after returning.
Default shortcut: Ctrl+M, F12
Note: If a subroutine call manipulates the stack and returns to somewhere else, Step-Out may not pause at the location you expect.
Save Virtual Machine State

Any time the virtual machine is stopped, you can save its state including the CPU, memory, execution flow, devices, etc. into a .vmstate file.
Load Virtual Machine State

When the virtual machine is paused, you can restore its former state by loading it from a .vmstate file. Saving and loading the state allows you to suspend debugging between Visual Studio sessions.
Add Virtual Machine State to the project

If you are analyzing code, it is useful if the virtual machine state files are the part of your project so that you can handle them with the same source control procedures as other project files. You can not only save a .vmstate file, but also add it to your project’s VmStates folder.
Note: In other articles, you can find more details about working with
.vmstatefiles.
Show Keyboard

Click this button to show the ZX Spectrum keyboard.
Shadow Screen

This toggle button turns on and off the shadow screen mode. When turned on, pausing your machine does not turn off display rendering, it goes on as if only the Z80 CPU has been paused. In this mode, you can immediately see the modifications in the screen memory and flashing works too.
ULA Render Point

This tiggle button turns on and off displaying the ULA render point. If you turn this mode on, in the paused machine state the emulator screen displays the pixel pair being rendered by the ULA.
Emulator Behavior
As soon as you load a ZX Spectrum project into Visual Studio, the IDE creates a new ZX Spectrum virtual machine according to the type specified when you created the project. This machine does not run; you need to start it explicitly.
Even if the ZX Spectrum Emulator tool window is closed, the virtual machine still runs in the background once you’ve started it. It halts if you explicitly stop it, close the current solutions, or exit the Visual Studio IDE.
While the ZX Spectrum Emulator tool window has the focus, the IDE forward the keystrokes to the emulator that senses them as if you pressed a key on the ZX Spectrum hardware.
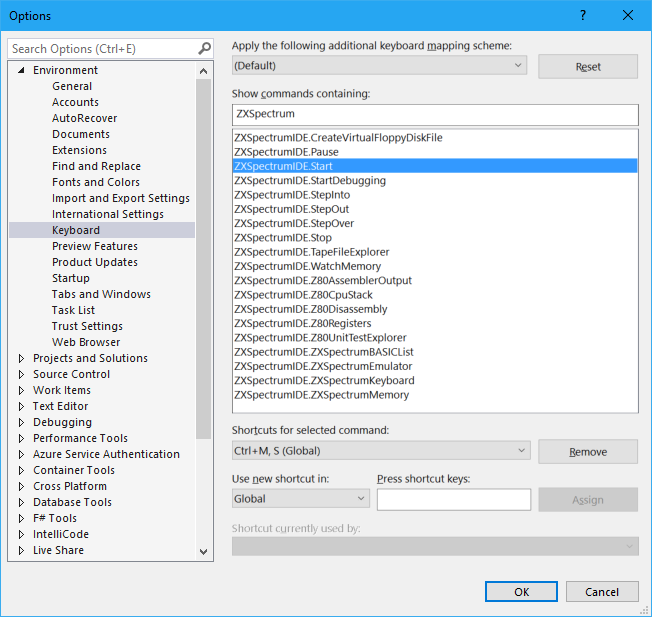
Customizing Shortcut Keys
If you do not like the current keyboard shortcuts, you can customize them in the Tools | Options dialog, within the Environment | Keyboard tab. To find the SpectNetIDE commands that are available for customization, type “ZXSpectrum” in the “Show commands containing” field:
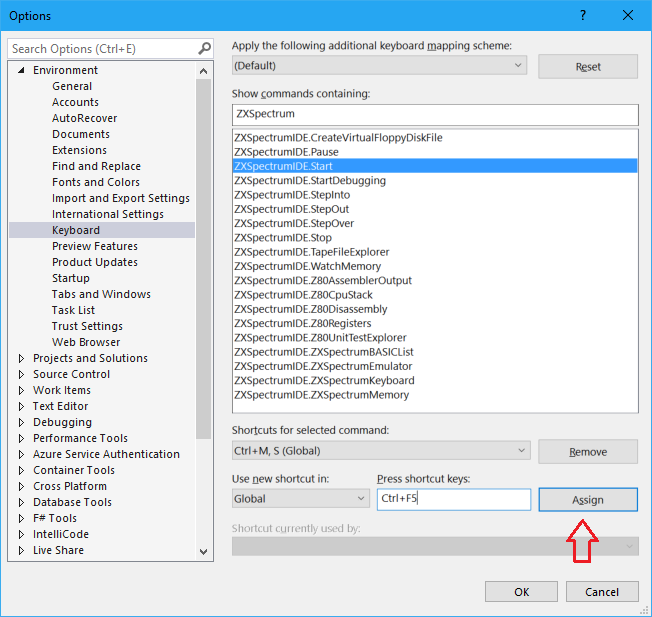
Select the command you intend to customize, set the focus to the “Press shortcut keys” field, and then, use the desired shortcut keys. Click Assign to bind the key to the command:
With these actions, the Visual Studio IDE does not replace the original shortcut key, but assigns a new one. You can open the “Shortcuts to selected command” to see the list of available key bindings:
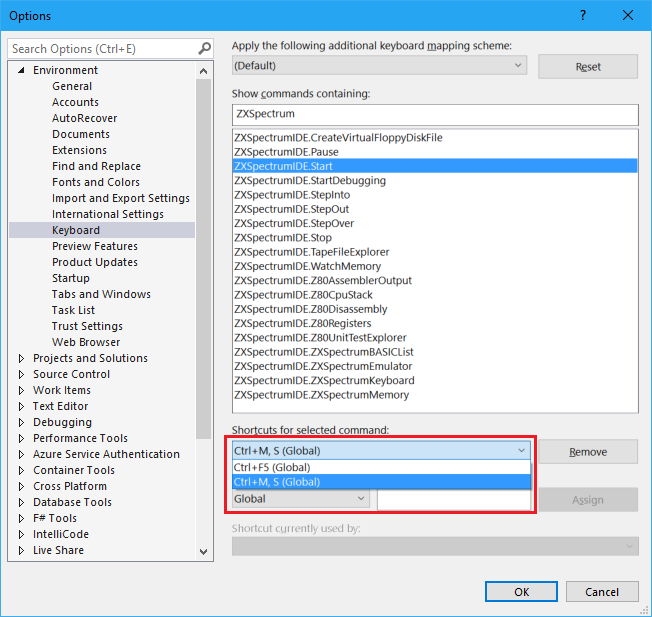
To delete an old or unused shortcut, select it from the dropdown list, and click Remove.