Video Layers
A ZX Spectrum Next picture is four layers — the ULA (or LoRes), the tilemap, Layer 2 and the
sprites — mixed by one of eight priority modes (NextReg $15), two of which blend Layer 2 with
the ULA or the tilemap. On top of that come the Layer 2 palette priority bit, stencil mode, the tilemap
above or below the ULA per tile, a global transparency colour ($14), a fallback colour ($4A) and four
clip windows. When a pixel is wrong, the screen does not tell you which layer drew it.
Klive can hide any layer, show one alone, mark the pixels no layer covers, draw the clip windows, and probe a pixel to tell you which layer produced it and which rule made it win.
This is a debugging view only. It changes what the emulator shows, never what the machine does: the
registers stay as the program set them, and sprite collision and “too many sprites” (port $303B) are
computed exactly as before.
It is available on the ZX Spectrum Next only.
The Layers Strip
Turn on Settings → Emulator → Show the Layers strip (or right-click the emulator’s status bar and
choose the Layers strip), or toggle a layer with the layers command, and a strip appears under the
screen:
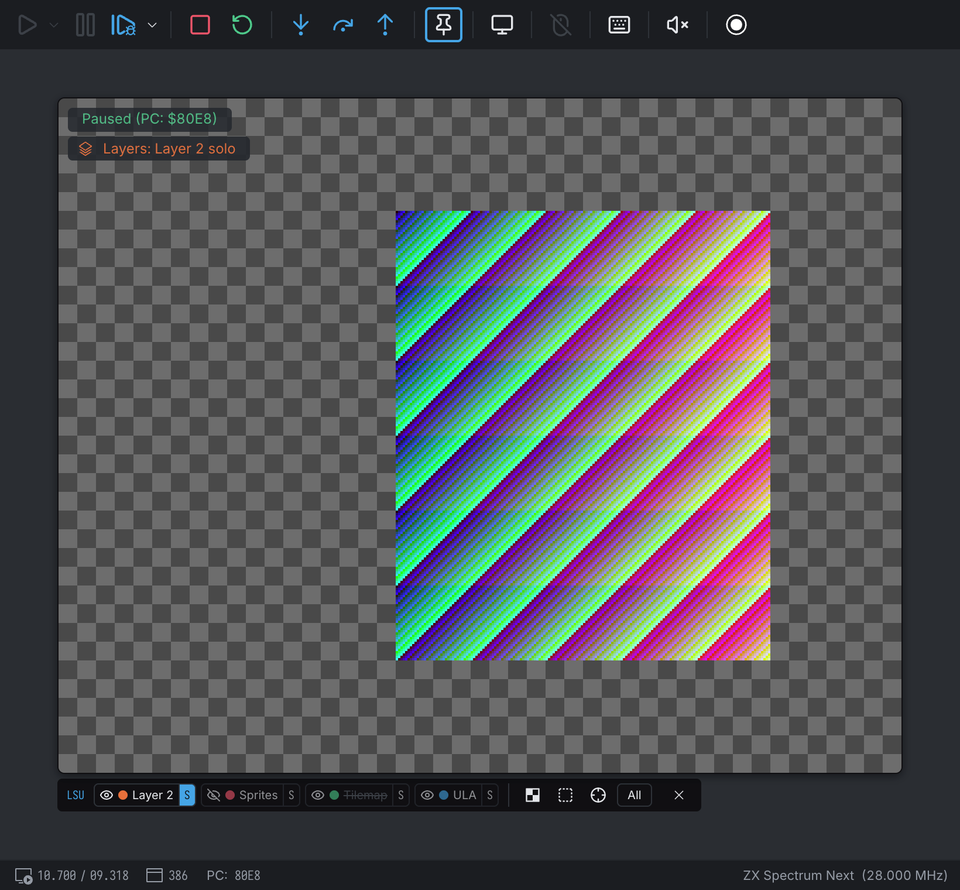
- The priority mode comes first (
SLU,LSU, … or the blend mode), then one chip per layer in that order, top layer first. The order follows$15live, including changes the Copper makes. - Click a chip to hide or show that layer. S shows the layer alone (solo) over a checkerboard, so its transparent pixels are visible.
- A layer the program has switched off has its name struck through — a different thing from hiding it here.
- The checkerboard button marks transparency: where no layer is opaque, the screen shows magenta
instead of the fallback colour (
$4A). With a solo layer, it marks that layer’s transparent pixels. - The dashed-square button draws the four clip windows, each in its layer’s colour.
- The crosshair button turns on the pixel probe.
- All shows every layer again.
- × closes the strip: it first returns to the composite picture — every layer shown, no solo, no transparency marking, the clip windows and the probe off — then hides the strip. Settings → Emulator → Show the Layers strip, or the status bar’s right-click menu, brings it back.
While any layer is hidden or soloed, or transparency is marked, a pill on the screen says so —
Layers: sprites hidden — so a forgotten toggle is never mistaken for a bug in your program.
Toggling While Paused
When the machine is paused, a toggle redraws the paused picture at once. Klive records each layer and
the mixer’s registers for every part of the frame the beam drew with different settings, so the
redrawn picture is exact even when the Copper or your code changed $15, $4A or a palette mid-frame
— on both sides of the beam. This recording runs only while the strip, the probe or the Layers
document is open.
If you turn the strip on while paused, nothing has been recorded yet: the pill adds approximate: exact from the next frame, and the picture is redrawn from the registers as they are now. Run a frame (or step through one) and it is exact again.
The Pixel Probe
With the probe on, pause the machine and point at a pixel:
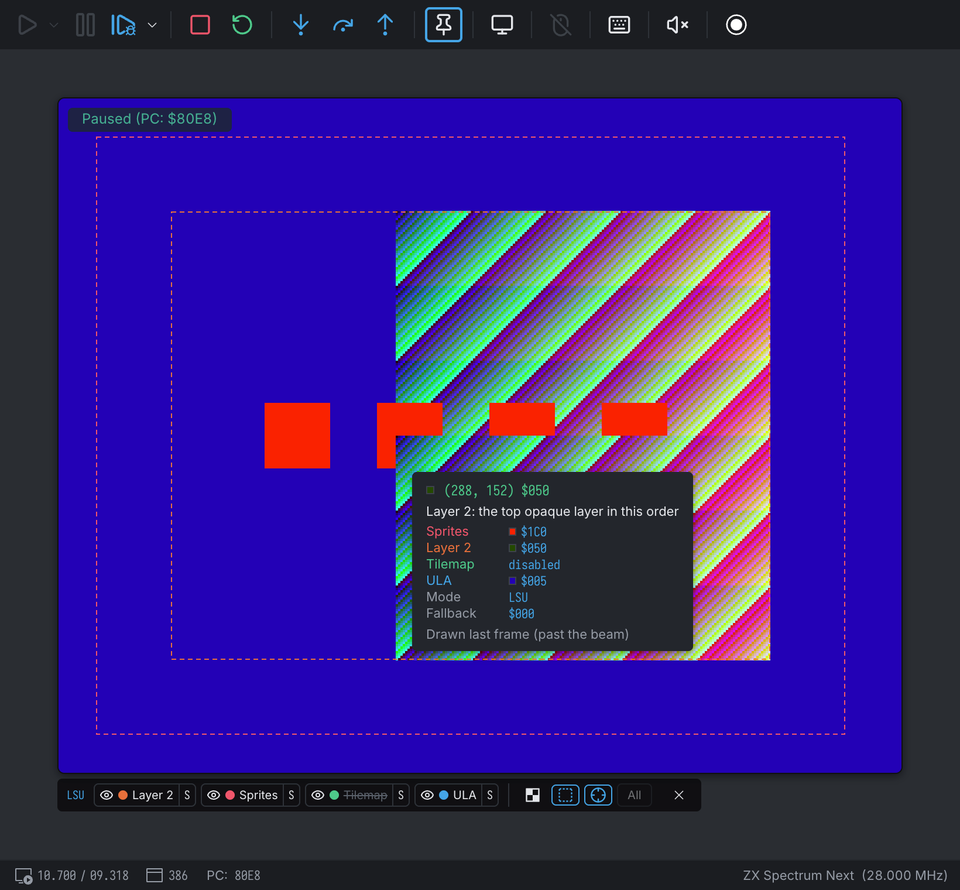
The probe shows:
- the pixel’s colour and the rule that chose it: the top opaque layer in this order, the Layer 2 priority bit, a sprite over the ULA border, stencil, a blend, or the fallback colour;
- each layer’s value at that pixel — its colour, transparent or disabled — with the Layer 2 priority bit, the tile’s “below the ULA” bit and the ULA border flag;
- the priority mode, stencil and fallback colour in force for that pixel, which under a Copper split differ from line to line;
- whether the pixel was drawn this frame or is left from the last one (past the beam).
When a layer is hidden, the probe also says what the machine itself shows there. Clicking the pixel opens the inspector that owns it: the Sprite Inspector, the Tilemap Inspector or the Layer 2 Inspector.
The Layers Document
View → Machine Views → Layers, or the show-layers command, opens a document with the
static picture:
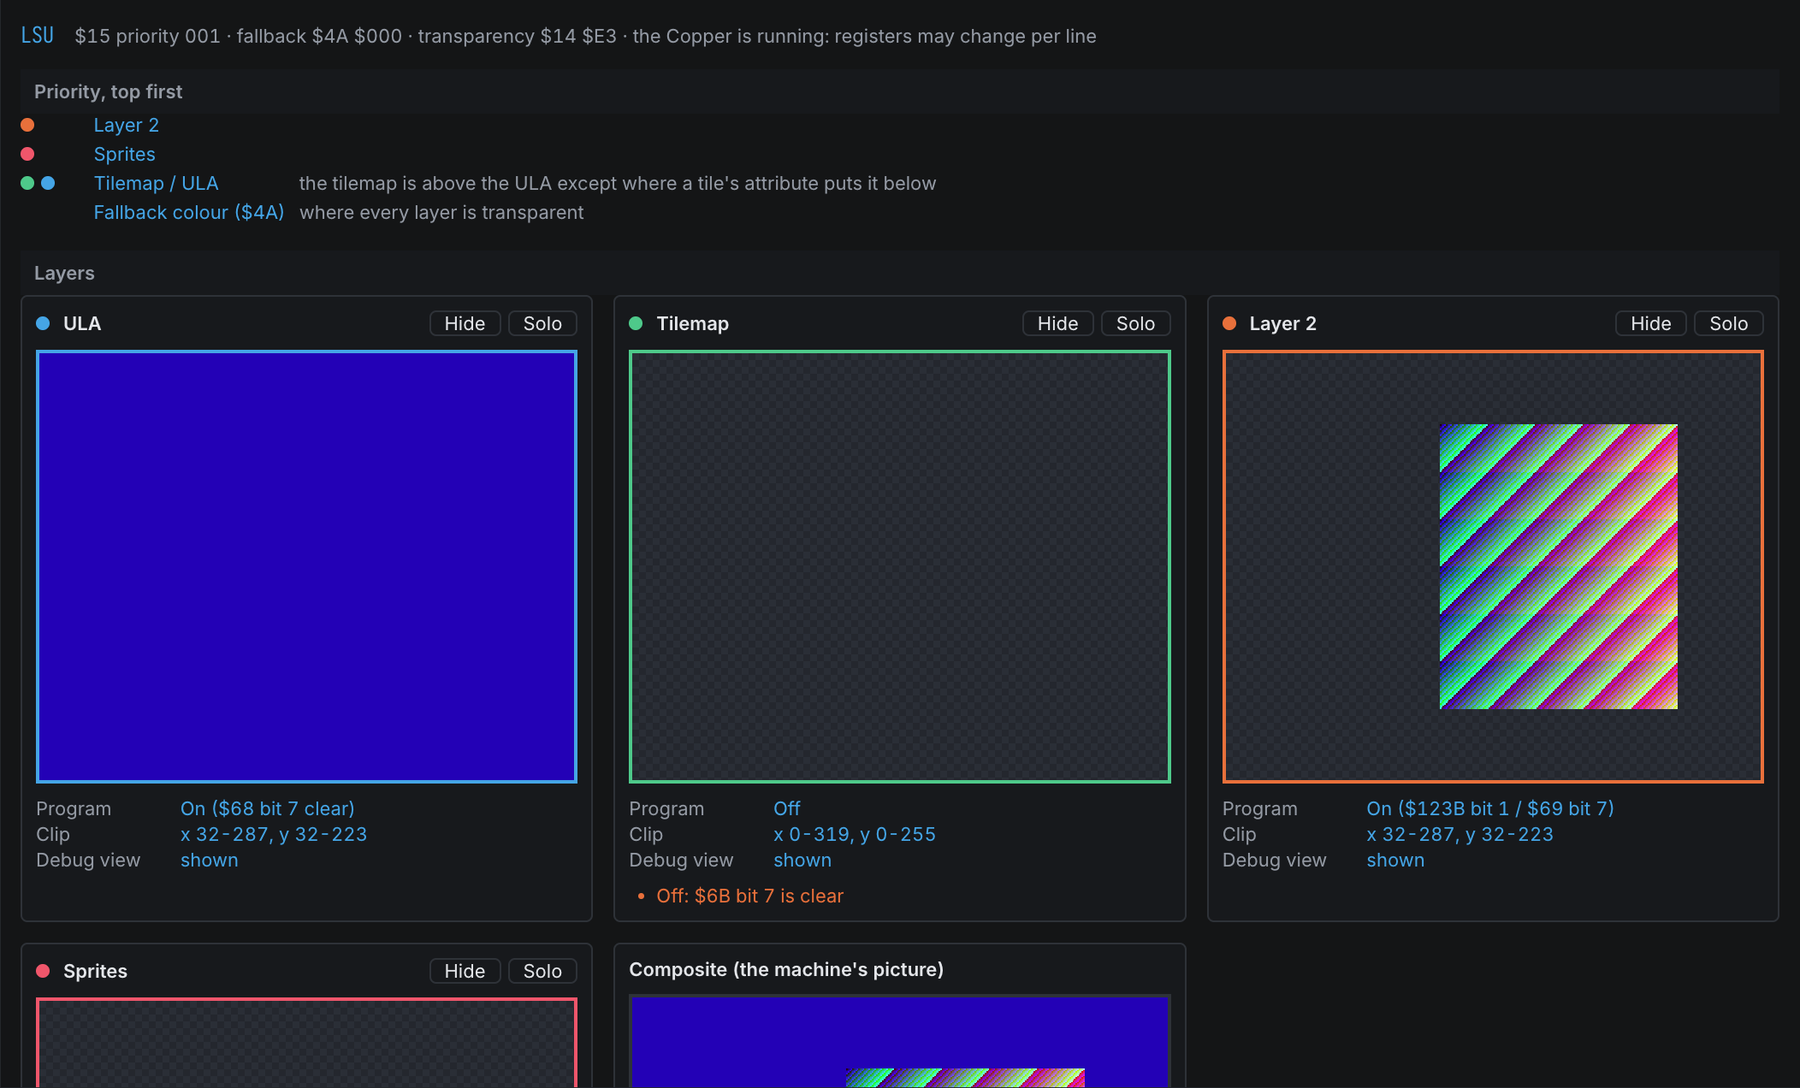
- Priority, top first — the stack
$15selects, with the Layer 2 priority pixels, the ULA/tilemap pair (and stencil), and for the blend modes what is blended with what. - A card per layer — its picture alone, whether the program has it on, its clip window, its state in the debug view, and the reasons it might not be on the screen: switched off, an empty clip window, every pixel transparent, hidden here, or another layer soloed. Click a picture, or Solo, to show that layer alone on the emulator screen.
- Composite — the machine’s own picture, with no layer hidden.
The Command
There is no Layers menu: the strip has every one of its controls. The layers command does the same
from the IDE:
layers                    ; list the layers
layers spr off            ; hide the sprites
layers l2 solo            ; Layer 2 alone
layers tm                 ; toggle the tilemap
layers transparency on    ; mark where no layer is opaque
layers all on             ; show every layer
The strip and the command change the same setting, so they always agree. It lasts until you close Klive; it survives a machine reset, and it is never saved in a machine state file.
Hiding a layer makes its pixels transparent; it does not switch the layer off. The difference shows in
two places. In stencil mode ($68 bit 0) the ULA shows only where the tilemap is opaque, so hiding
the tilemap hides the ULA too, while switching the tilemap off ends stencil mode. And a hidden tile
keeps its “below the ULA” bit, which still decides where the ULA goes in the blend modes.